|
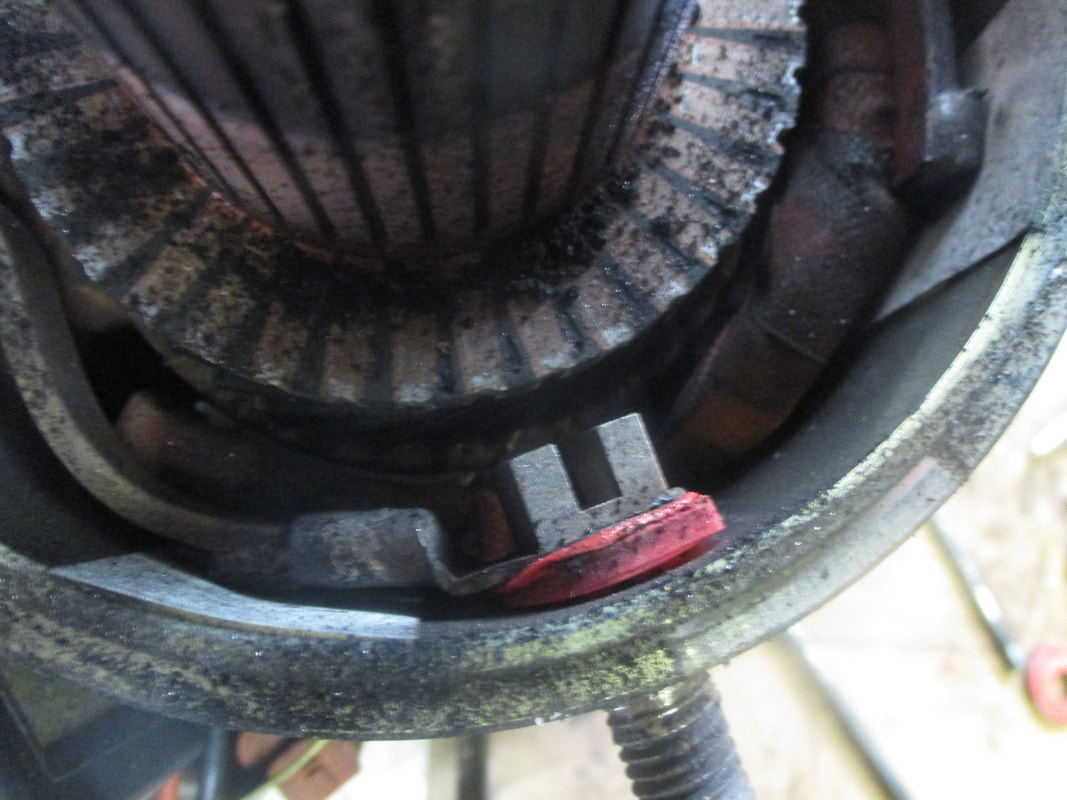
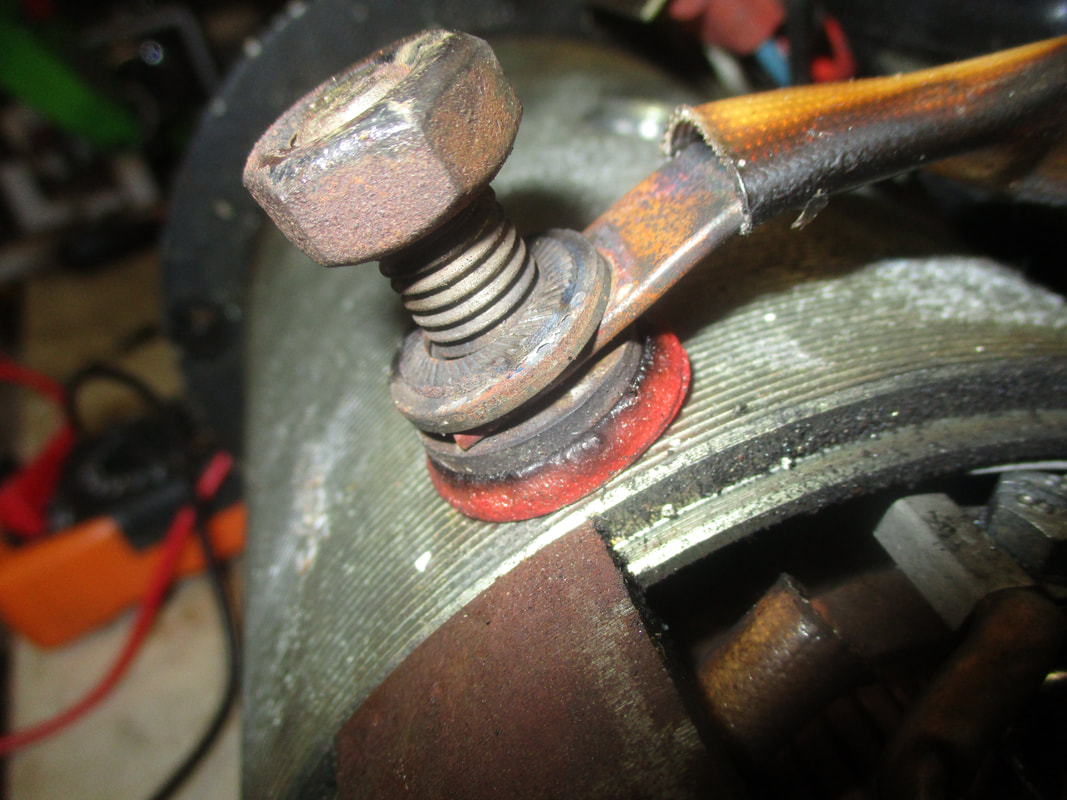
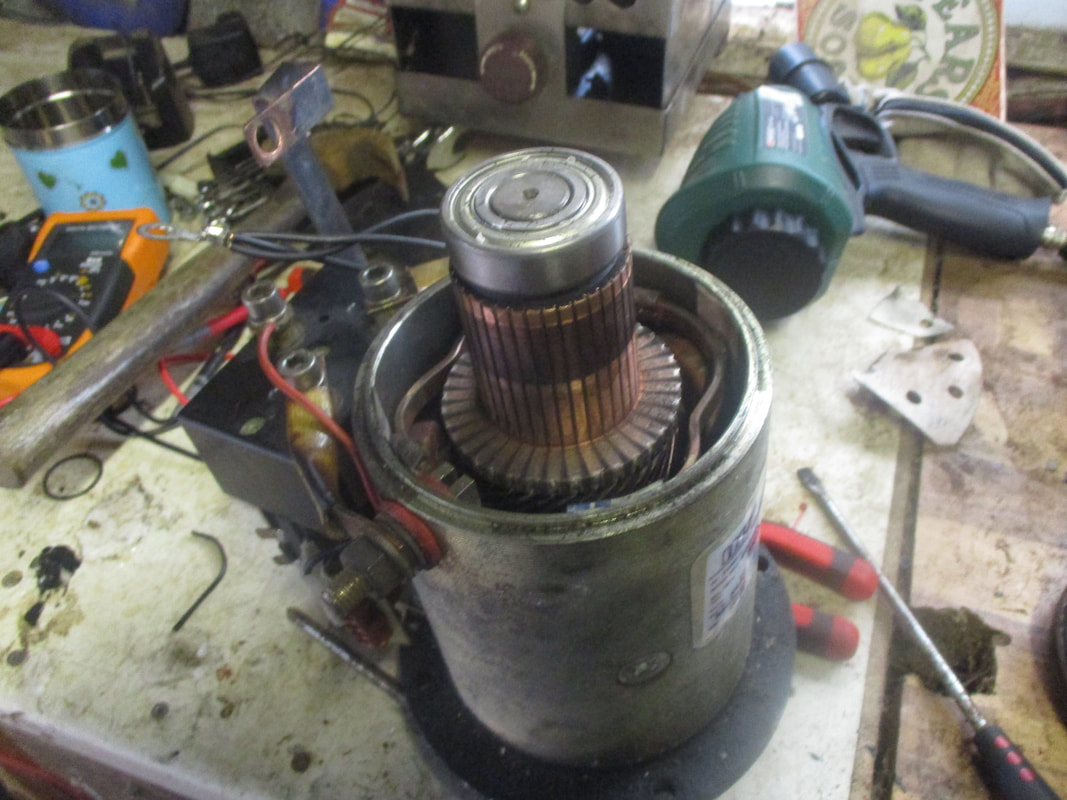
The day before we were to bring Roys joy home we sufferd our first mechanical failure and thought we were on fire . While maneuvering to the fuel dock at Brixham marina the Vetus bow thruster failed in spectacular fashion filling the boat up with smoke with a acrid electrical smell . After a quick inspection to make sure there were no flames and some careful maneuvering with a side wind we made it to the fuel dock . Since this we have been without the thruster which has not been a problem but it needed fixing . 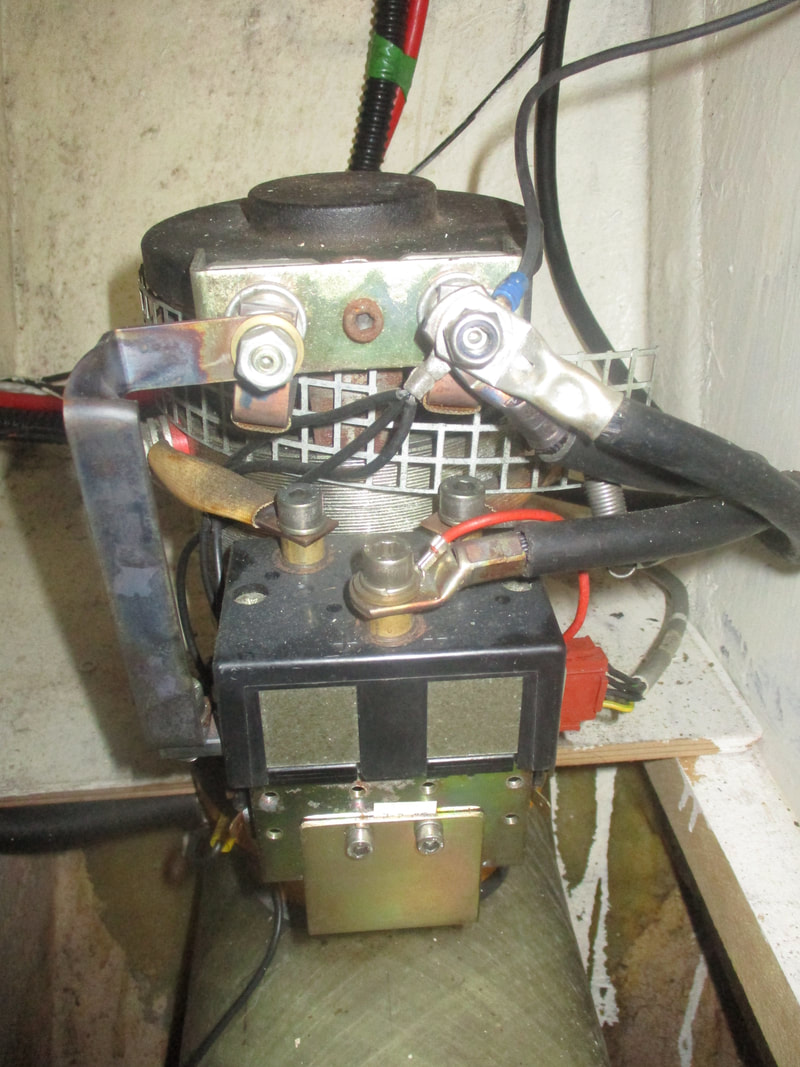 We have spent about 3 hrs on board trying to work out what went wrong but all we could get from the motor was the clicking of the solenoids . I have then also spent 2 hrs on the net researching this issue with minimal if info found , so the best thing was to remove the motor and get it home to try to sus out. The only thing visually i could find was a semi melted isolation washer for the supply to the field winding but otherwise that was it , First thing i wanted to check was the easy stuff , Brushes , connections , plugs etc . After the easy stuff i tested the solenoids which seamed to be working as they should , next was to take the whole motor apart and check the internals , Here there was some carbon build up and some light corrosion on some of the connections [ Remembering she hasn't been used in a very long time ] so these were cleaned up and the motor was put back together . Back to the solenoids , These are the easiest set ive ever come across to be able to check and fix . Take out 3 screws and you can take them apart to clean and inspect the contacts , simple . So after going over them cleaning every part and abrading the contacts a little it was time to put them back together . 1st time i managed to fit the lower plastic spacer on back to front but 2nd time they went back fine and Tested all ok so now to put them back on the motor and see if there was any life . ALIVE and kicking , Seams it must of been the solenoids not having a good contact , Although there was voltage passing i didn't check to how much with the multi-meter at the start as no expert with them, But it has been a good exercise . I have now learnt how the whole unit comes apart and how to check everything for the next time we have an issue so one bonus out of it all . 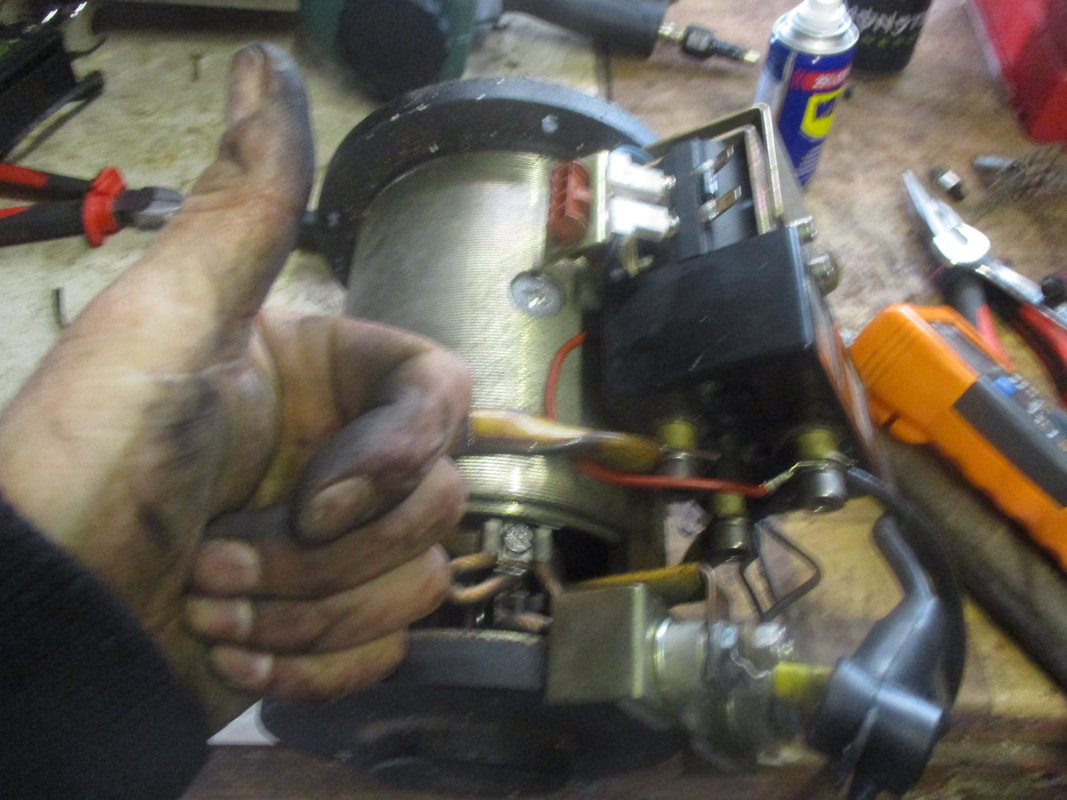
0 Comments
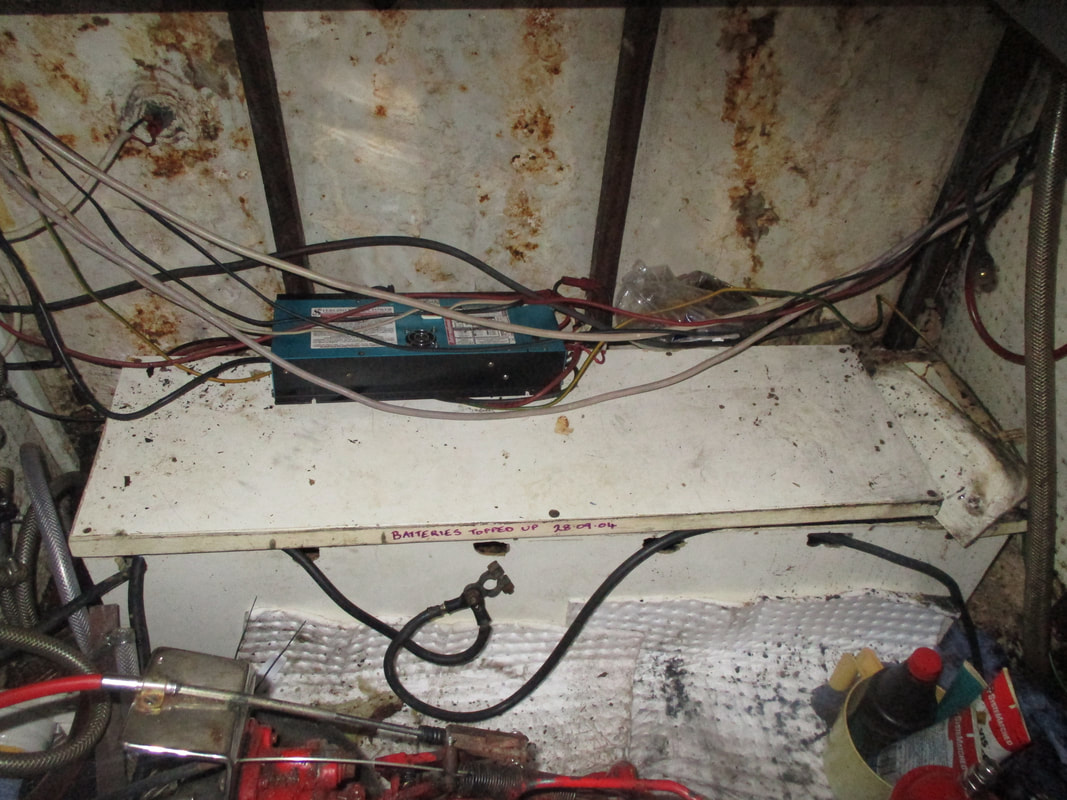
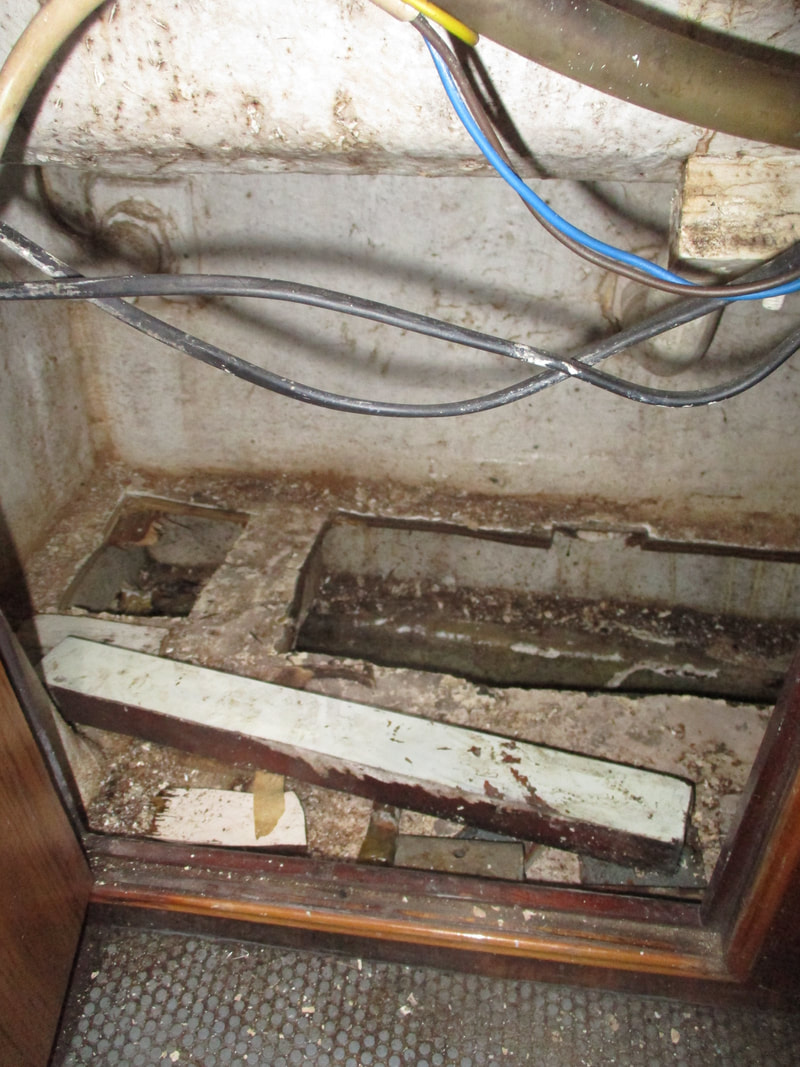
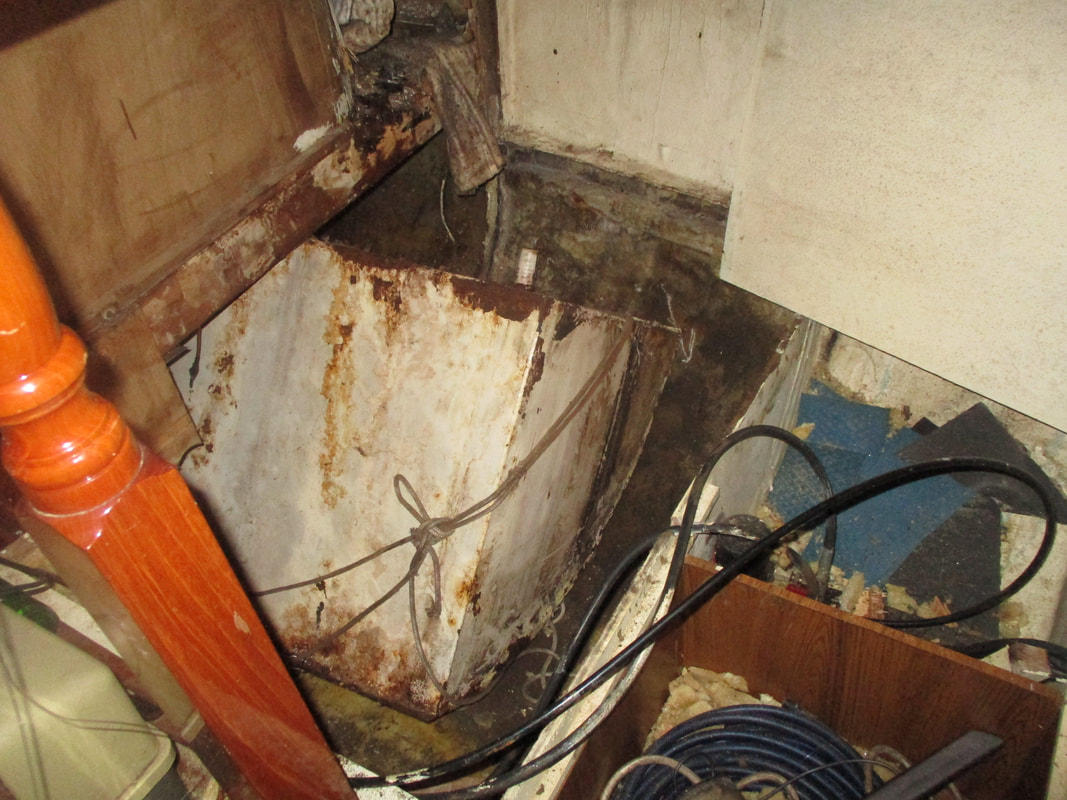
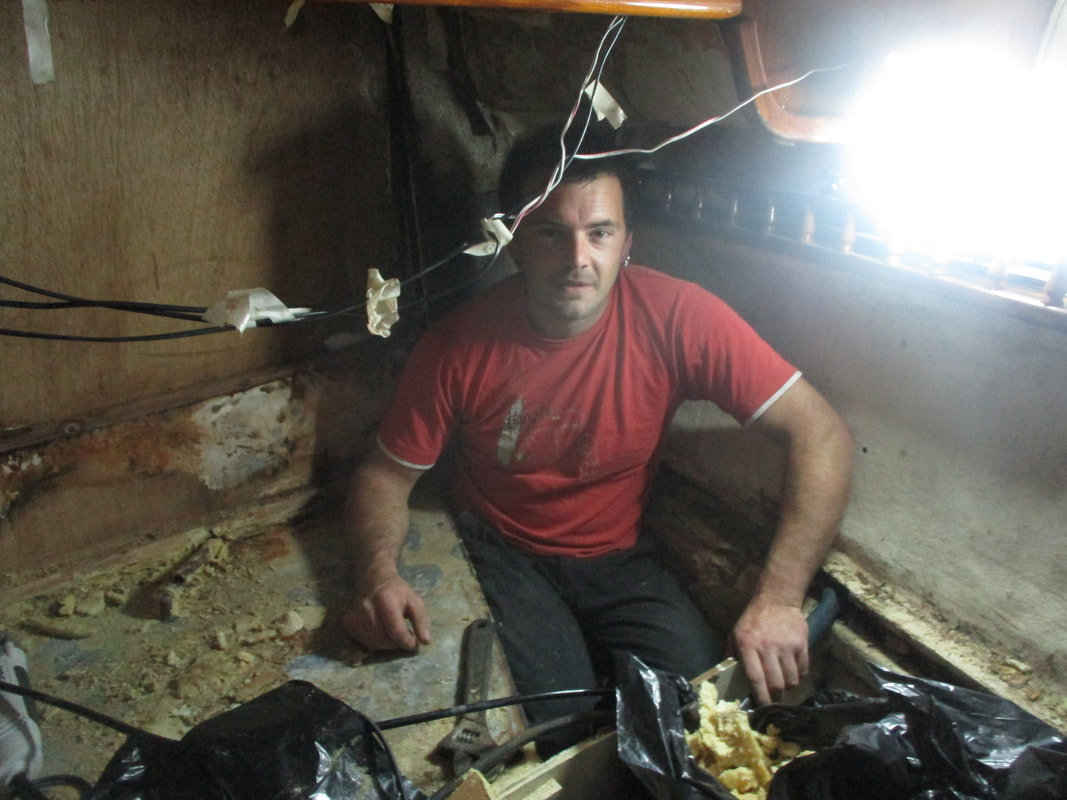 The ongoing removal on one of the water tanks has been mainly taken up with removing all the foam infill and other junk chucked in the space around the tank . We also found the what i taught was a GRP tank is actually a galvanized steel tank just it had a GRP sheath over the top. So far we have removed 12 bin bags of foam and timber out with another 3 - 4 to come out , then we can hopefully remove the tank so we can start work on the timber repairs and working out what to reinstall for a new tank We are just looking up if we can fit flexi tanks or just to go for new rigid off the shelf tanks 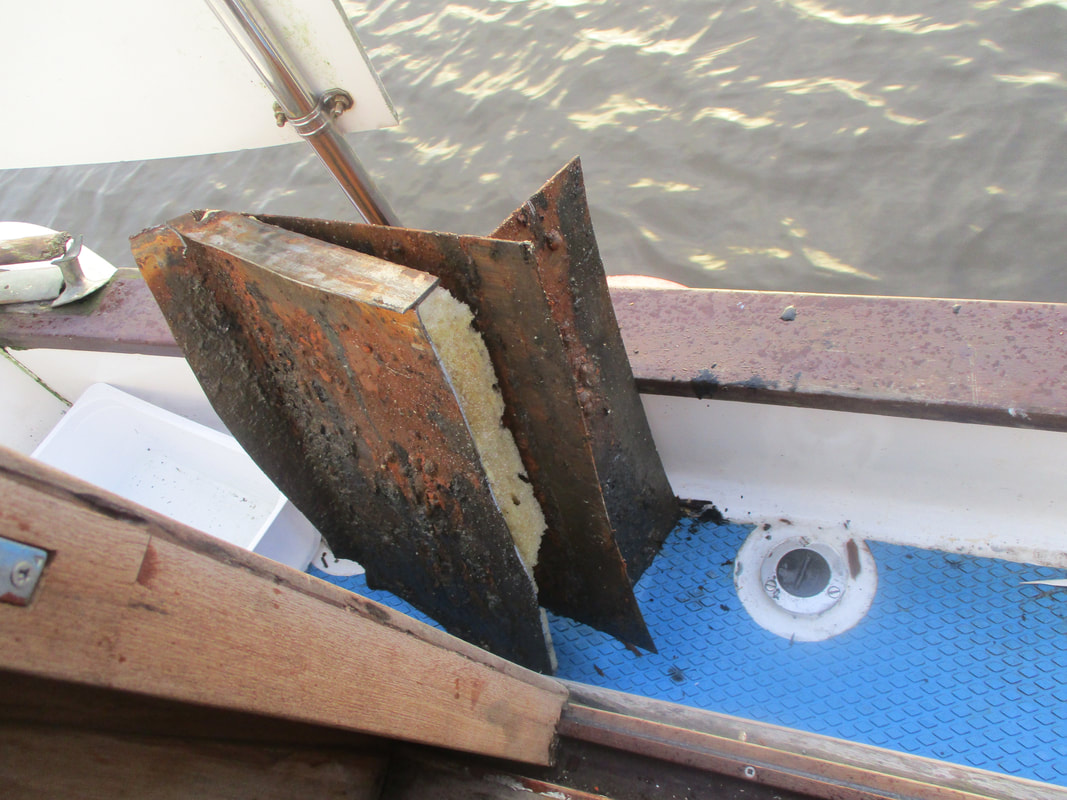 After getting the top of the tank of we could see just how bad the internal condition was The problem now was that due to the fact it was foamed in to place with the hydraulic steering pipes passing through the foam we were going to have to remove bit by bit . I didnt want to use an angle grinder due to the flammability of the foam and also being right next to a battery bank and also one of the 400 ltr fuel tank's. so out came the jigsaw and metal blades and on went the slow painstaking removal section by section . In all it took me about 25hrs over 6 weeks to finally get the tank out but not after going through 3 cutting disks , 3 packs of metal blades and breaking the inverter on 2 occasions . 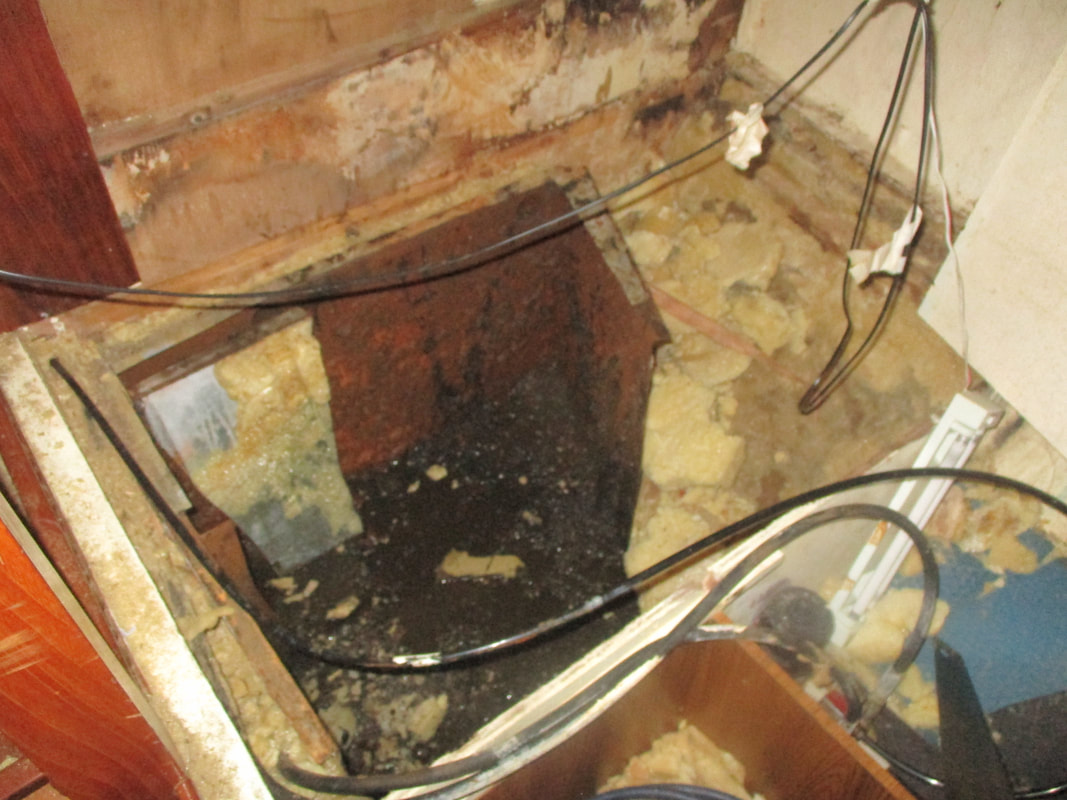 After getting the tank out there was a good old cleanup job needed in the aft cabin , there was some black spray off the angle grinder fro the internal sludge - foam to remove where i could not get to beforehand and to remove all the rot in the bulkhead ready to be replaced . On top of this everything that was stored on the bunk is now piled up at the back of the cabin and this needs resorting as the contents of this stuff is our spares - materials and tools for the work on board . 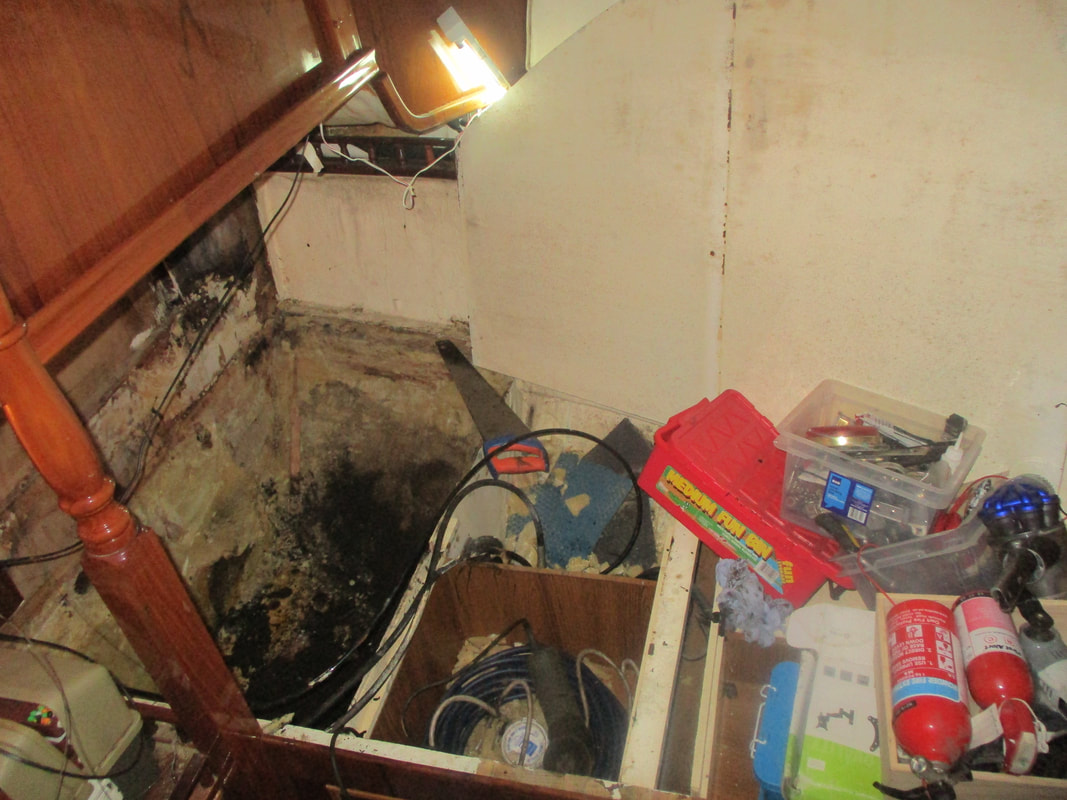 After good clean up it was the task of putting the jagged parts of the tank in the tender and getting it to the slip without puncturing it on the way ready to add to the scrap pile 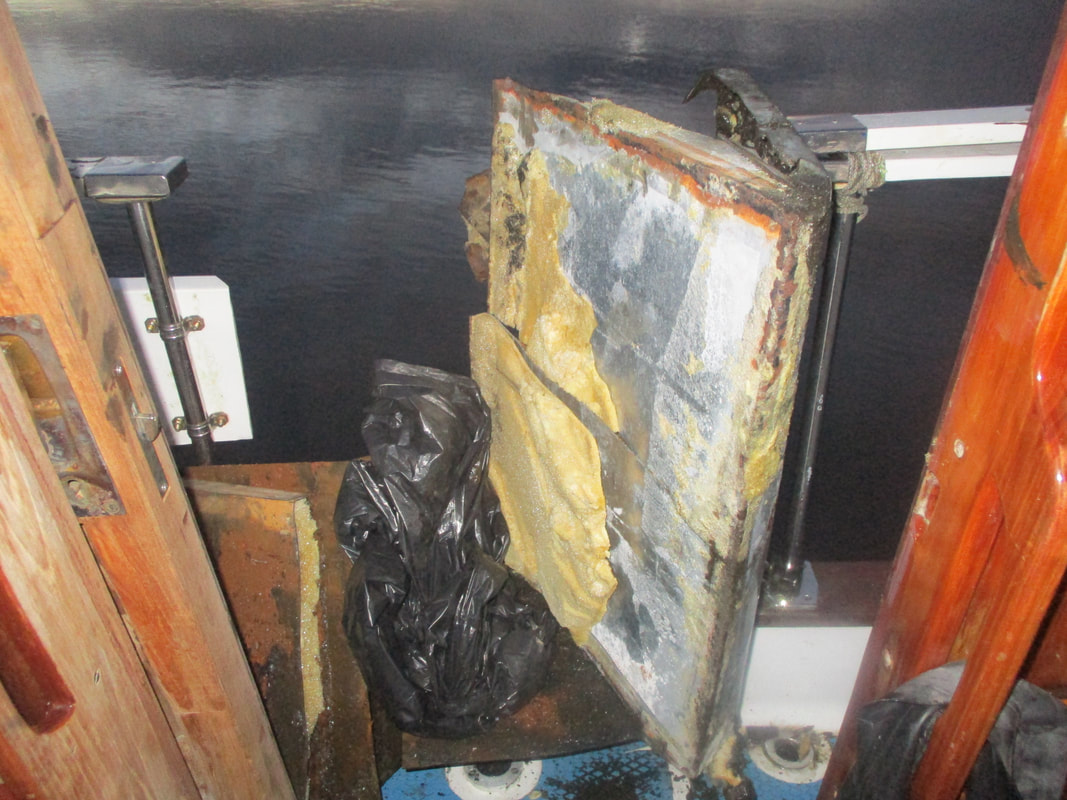 So the plan was to get the measurements of the space and find a tank to fit , ready for the christmas holidays to start refitting . This was put off thanks to finding out the only way we can get the fuel tank out is back through the aft cabin , otherwise we would need to remove the engine to get it through the engine bay . So now instead of refitting the aft cabin and water tank we start on the fuel tank removal which commenced the week after completing the water tank removal on Christmas eve . 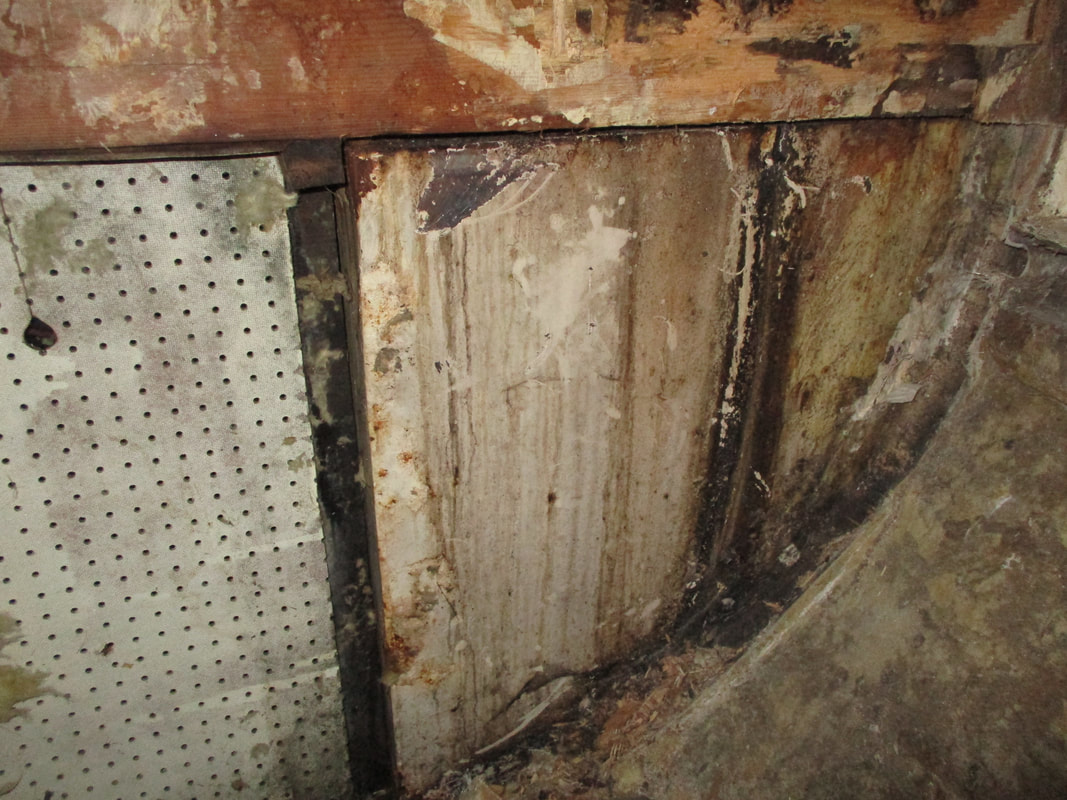 So 2 weeks of odd evenings out on the river chopping away boarding and boxing , removing cables and cutting access holes and even more foam removal . Finding there was not much holding the tank in appart from a few brackets [which were not accessible] and the foam i thought this may be a easy job compared to the water tank . How wrong could i be ?? To be continued !!
One on going pain in our ar@~ is a mooring for Roys joy . When we were looking in to buying her we knew there was a deep water mooring available at our sailing club and had preliminary booked its take over . the day we purchased her we re contacted the mooring officer and was told that it had been reallocated to another member due to a mix up .
We were then told that something would be sorted which we thaught ok just a sort out later type of thing . Then the day before we were to bring her home we were told that none of the club moorings were made big enough for Roys joy and not even a temporary arrangement could be made - on to plan B - ALWAYS HAVE A PLAN B !!! Plan B was a temporary mooring with the local yard although we had this arranged we didnt know for how long or how long we would need it for . This was not ideal as it was going to cost us £150 a month which was a huge chunk out of our almost diminished budget . So Roysjoy went to a yard mooring while i was left to do some major digging for another alternative First offer was from one of the local waterside residents that had a spare mooring but we had to wait over 2 weeks for them to get back to us only to find that a friend of theirs wanted it even though they had no boat !!. Next was the other yard that had some sublet moorings on a private lease - although no one wanted to temporary let their empty mooring even for a short term . So 2 months on and £300 later We finally found the holy grail of the moorings here - A duchy leased deep-water spot nice and close to the shore and fairly well sheltered and the last one that was available [ they are never available ] , Only down side was we needed to supply our own block & tackle . 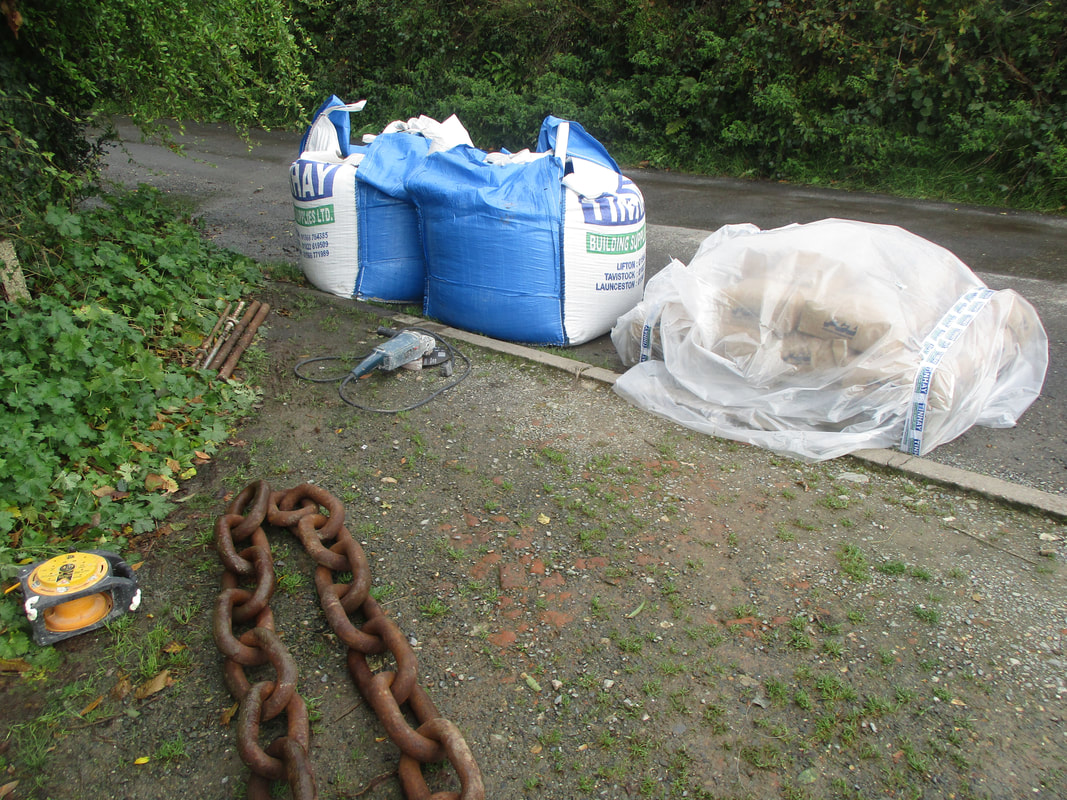
Round here if you want a mooring made you have to do it your self or pay serious cash for someone to make it for you . First thing was to work out how big we needed and how big we could move on land and on the water - Max the barge would carry is 3 ton and the min size we needed was 1.9ton , The max our friend could lift was 4 ton so we went for 2.6ton block . First this was to do some ordering , 1st order consisted in 2 dumpy bags of ballast and 300kg of portland cement . the hardest part was to source the ground chain - after 2 weeks of phoning and emailing local companies we found what we were looking for - 40mm ferry chain and 25mm riser - another 300kg .
To make the block we managed to borrow the club mold which is simply 2 flat sheets of steel that bolt together, simple but very effective. 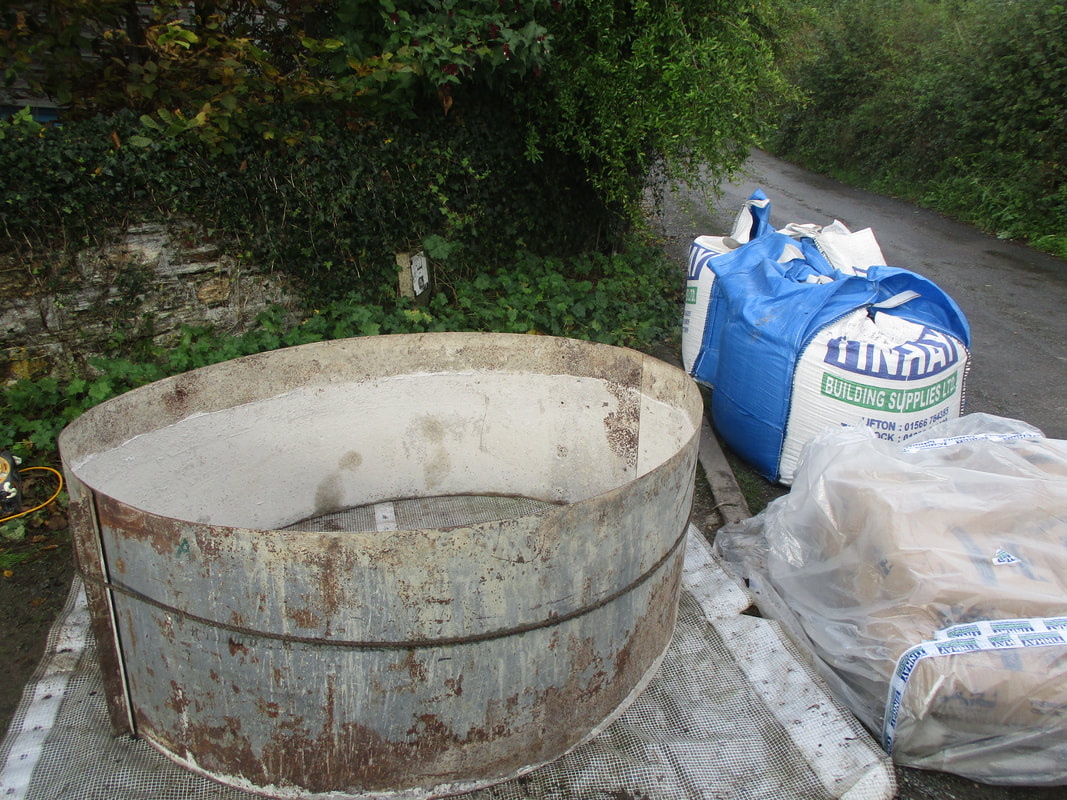
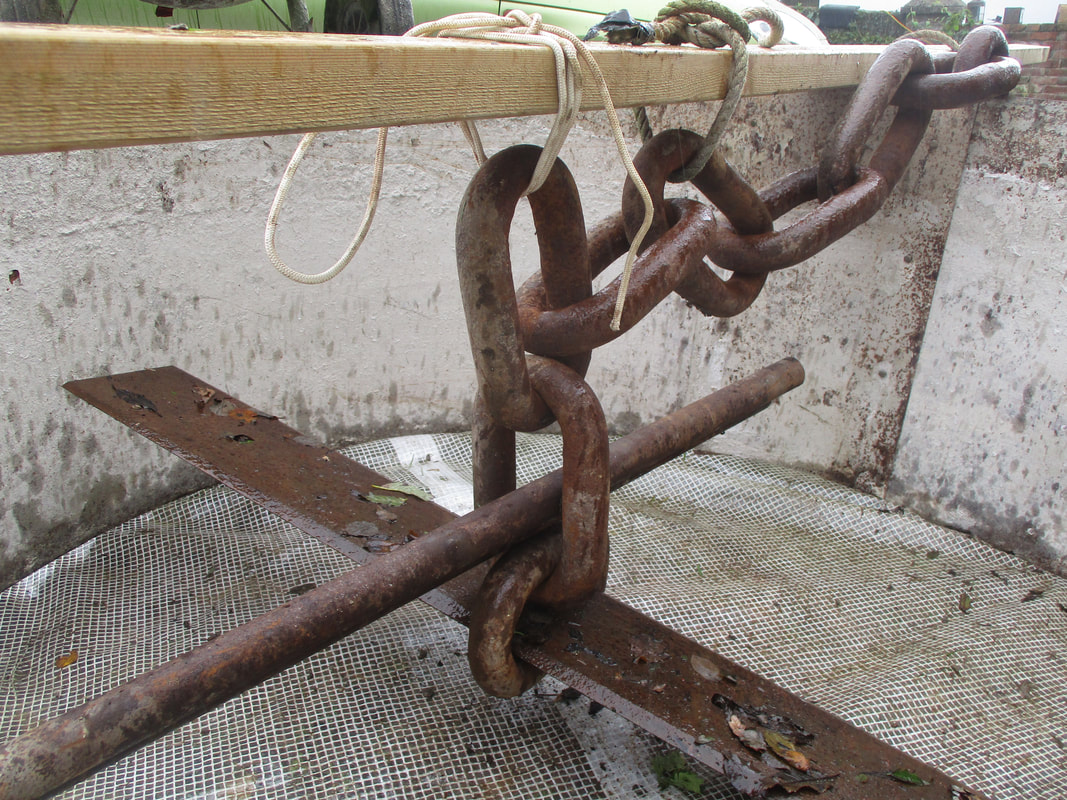
To secure the chain in the block we needed some heavy steel , Luckily we just happen to have a lot of scrap bits [ or junk as others call it ] and in there was a 3inch diameter steel bar and an old Loading shovel blade which fitted the links perfect
Then came the hard part , 4 hrs of mixing cement and shaking out the bubbles .
Jake worked hard through out this but he enjoys messy jobs but was knackered at the end . 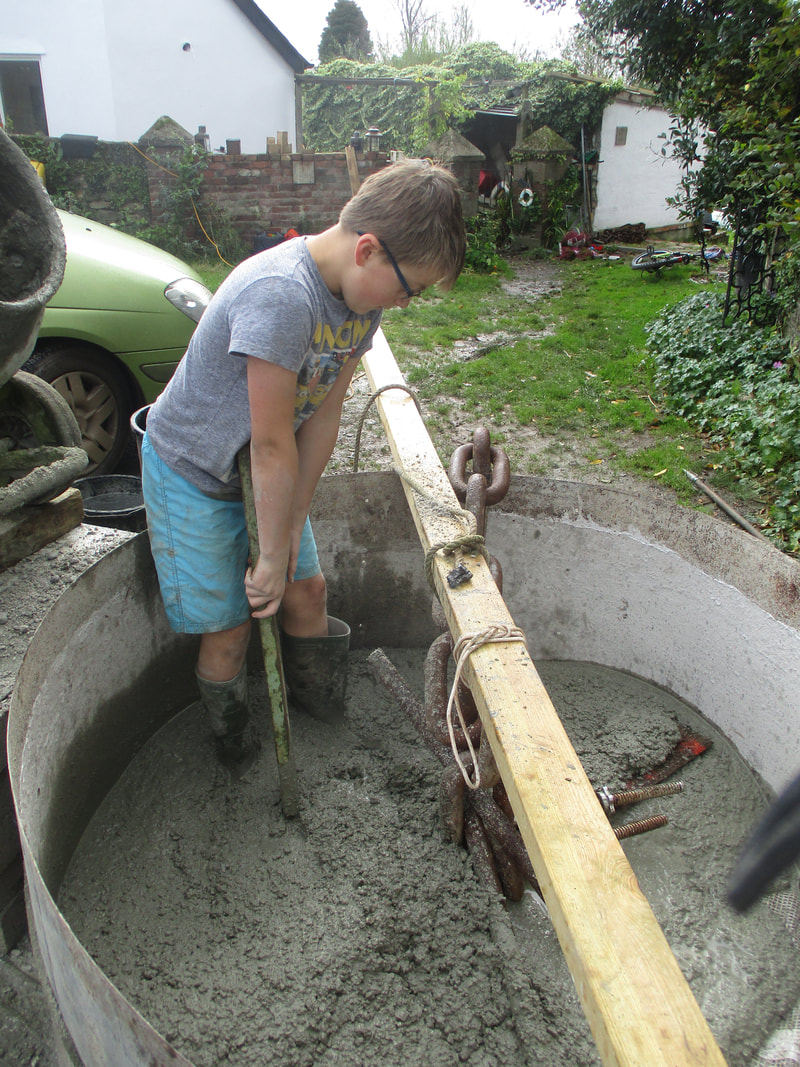
In between some heavy rain and cups of tea we soon started to crack on with the job in hand .
Worst part was we dont have a out side water supply so we had to also bucket by bucket over 300ltr of water out from the house up the drive to the mixer . 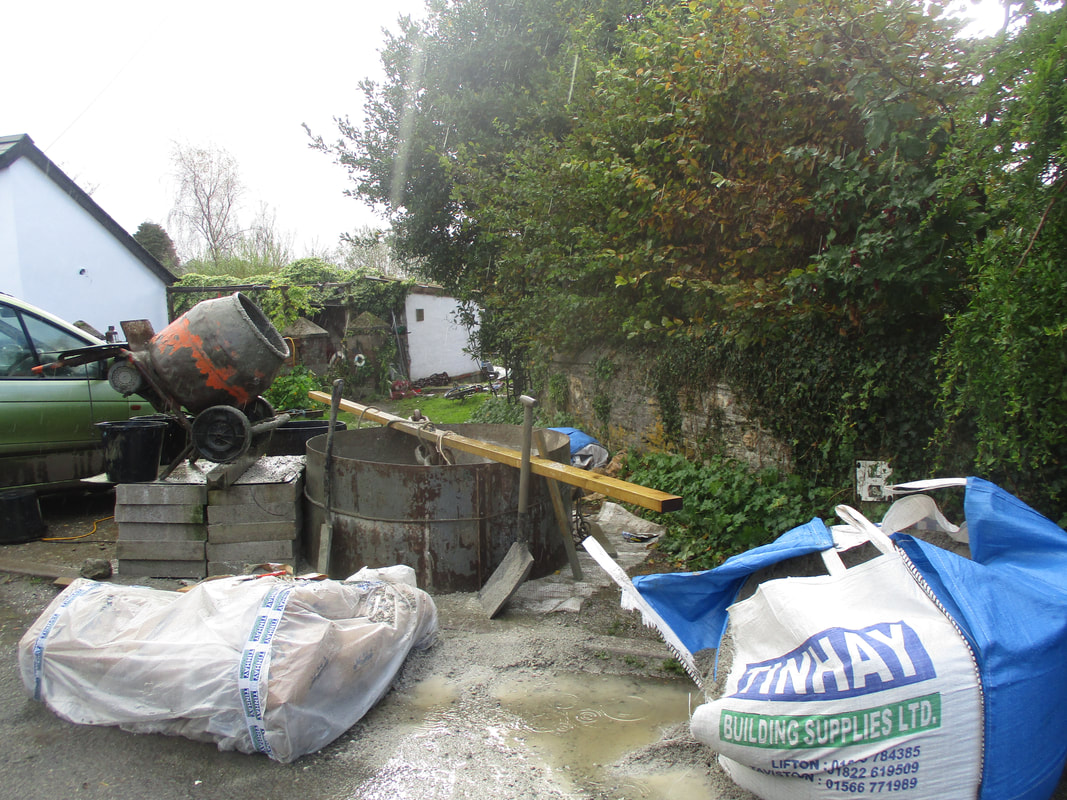

Once were done we had to wait 12 days for the concrete to set fully before we could move it to the slipway in readiness for the barge to move it out in to the river .
In the mean time we needed to locate a A5 buoy [as all the ones we had were too small to float the chain] and some 30mm warp to make the strops . Also we needed to attach the riser chain and swivel and buoy rope . 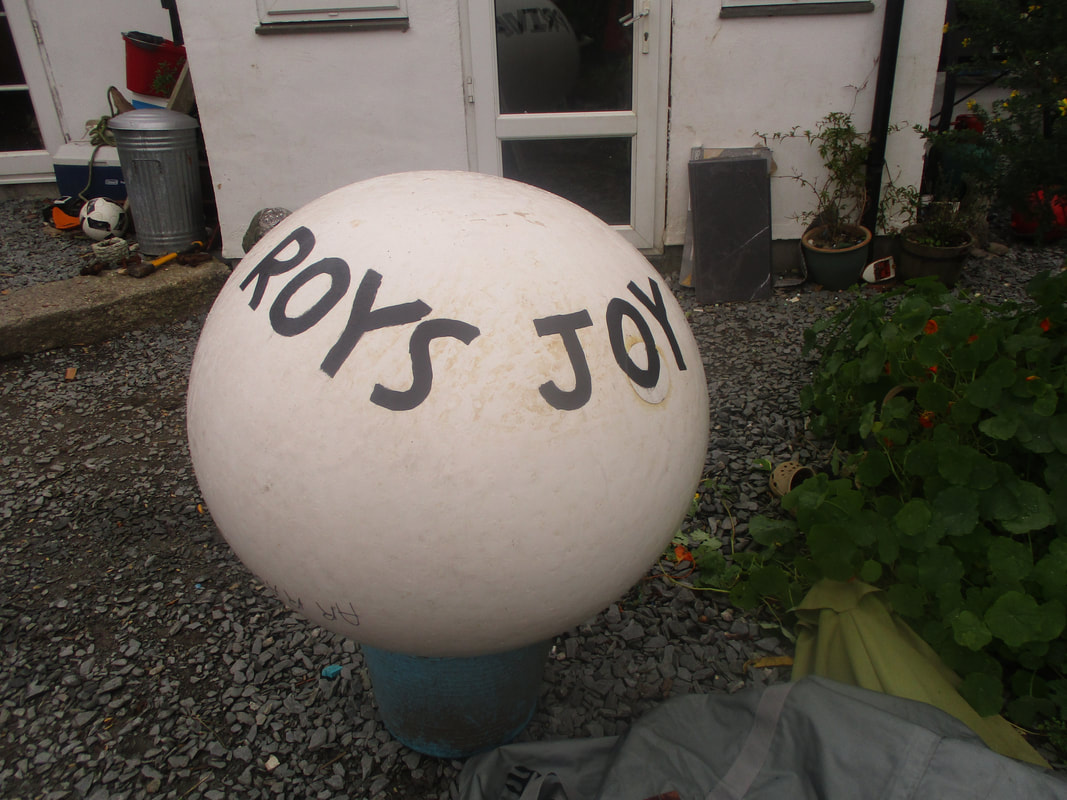
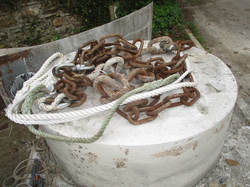
With a stroke of luck we found a buoy locally after being again let down by a seller up country and at a bargain price of £25 who could complain as the RRP is around £180
We also went to the local army surplus store to get the 7mtr of 30mm and 22mm nylon warps at £65 . these we spliced with one hard eye and one soft eye . Over the top of these will be 3 mtr of layflat hose on each to act as a chafe guard [ on order £8 from ebay] . After the 12 days we booked in our local farmer friend who picked up the block and took it the 1/2 mile down the lane to the slip and placed it at the spring low tide line . 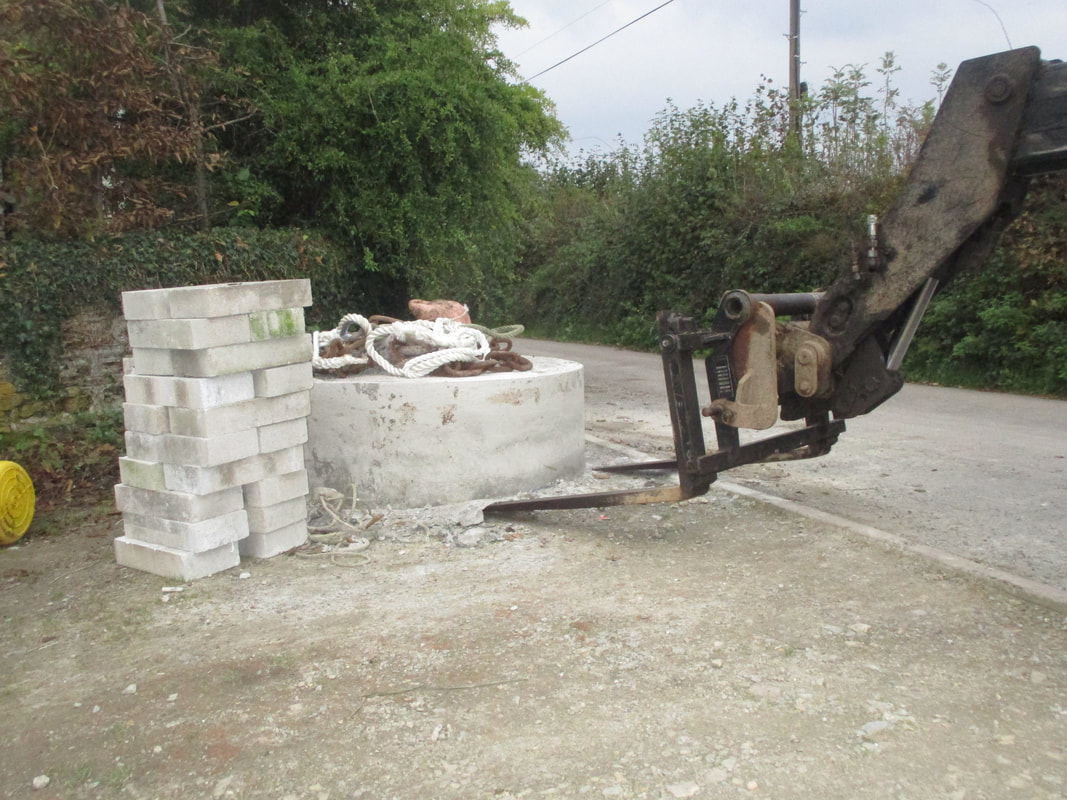
We then attached the new buoy to await the barge.
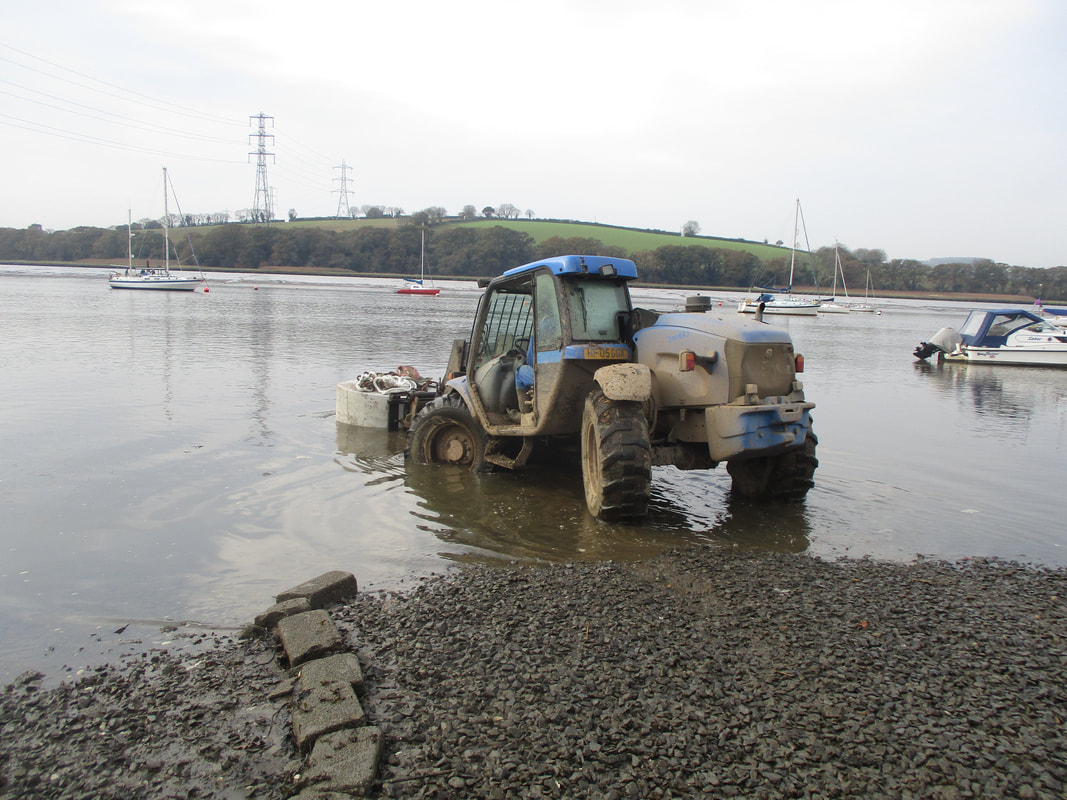
We have the club mooring barge and crew booked in to pick up the block and take it to our spot 1/4 mile up river . The day came to finally lay the new mooring . High tide was needed so we had the barge booked for the morning 9am sharp we boarded the Barge picked up the mooring with the block and tackle and motored the 10 min up river , After some positioning I was given the hammer and told to drop the block when I was happy with the position . This barge uses a large pelican hook to release the moorings and 2 hits had the block released and the mooring positioned. 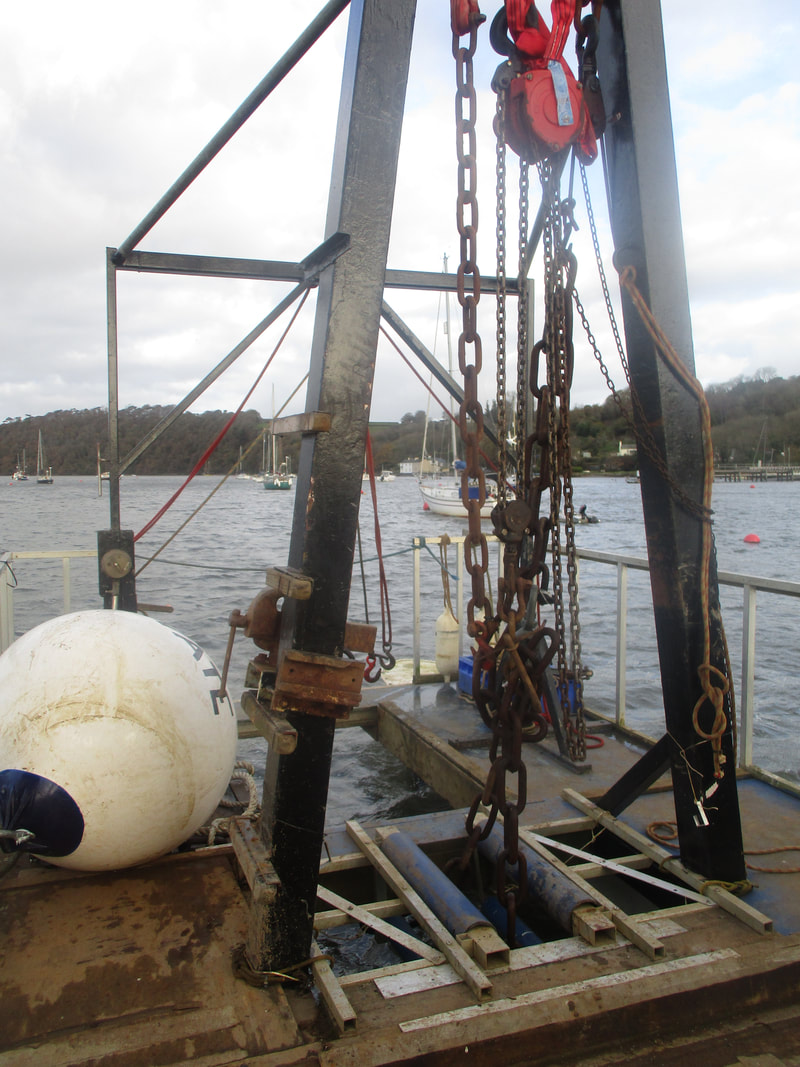
Next morning we headed to our new mooring to add a pick up buoy then went to get Roysjoy . Me and Jake said good bye to the yard mooring and motored the 3 mins to our new one . After a little faffing about we had her tied up [ one of the strops had twisted on to the chain on dropping the mooring] .
Now we ca drive 1 min down the lane and Roys joy is right there so we can now keep a better eye on her over the winter months . 
Costs of making a mooring
Cement and ballast £168 Ground chain £140 Riser chain £138 Shackles £35 Swivel £25 Strops x 2 £65 Lay flat hose £8 A5 buoy £25 Galv thimbles £10 Telehandler 1x bottle Whiskey Mooring barge £30 Total £659 + Anual rent £178 PA
Suppliers and services links
Shackles - chain swivels and warps from https://knightsurplus.co.uk/
Buoy from https://plymouth.cylex-uk.co.uk/company/marine-bazaar-13161215.html
Temporay mooring from http://www.weir-quay.com/
Strop chafe protection from http://www.ebay.co.uk/itm/Yellow-PVC-Layflat-Hose-Water-Discharge-Pump-Irrigation-Sold-By-The-Meter/202072813000?ssPageName=STRK%3AMEBIDX%3AIT&var=502068449425&_trksid=p2057872.m2749.l2649
Mooring mold - mooring barge from http://www.weirquaysailingclub.co.uk/
|
AuthorOne family renovating a Colvic Watson and preparing for an epic adventure Archives
April 2018
Categorieshttps://www.facebook.com/hambleys/
|
 RSS Feed
