|
One on going pain in our ar@~ is a mooring for Roys joy . When we were looking in to buying her we knew there was a deep water mooring available at our sailing club and had preliminary booked its take over . the day we purchased her we re contacted the mooring officer and was told that it had been reallocated to another member due to a mix up .
We were then told that something would be sorted which we thaught ok just a sort out later type of thing . Then the day before we were to bring her home we were told that none of the club moorings were made big enough for Roys joy and not even a temporary arrangement could be made - on to plan B - ALWAYS HAVE A PLAN B !!! Plan B was a temporary mooring with the local yard although we had this arranged we didnt know for how long or how long we would need it for . This was not ideal as it was going to cost us £150 a month which was a huge chunk out of our almost diminished budget . So Roysjoy went to a yard mooring while i was left to do some major digging for another alternative First offer was from one of the local waterside residents that had a spare mooring but we had to wait over 2 weeks for them to get back to us only to find that a friend of theirs wanted it even though they had no boat !!. Next was the other yard that had some sublet moorings on a private lease - although no one wanted to temporary let their empty mooring even for a short term . So 2 months on and £300 later We finally found the holy grail of the moorings here - A duchy leased deep-water spot nice and close to the shore and fairly well sheltered and the last one that was available [ they are never available ] , Only down side was we needed to supply our own block & tackle . 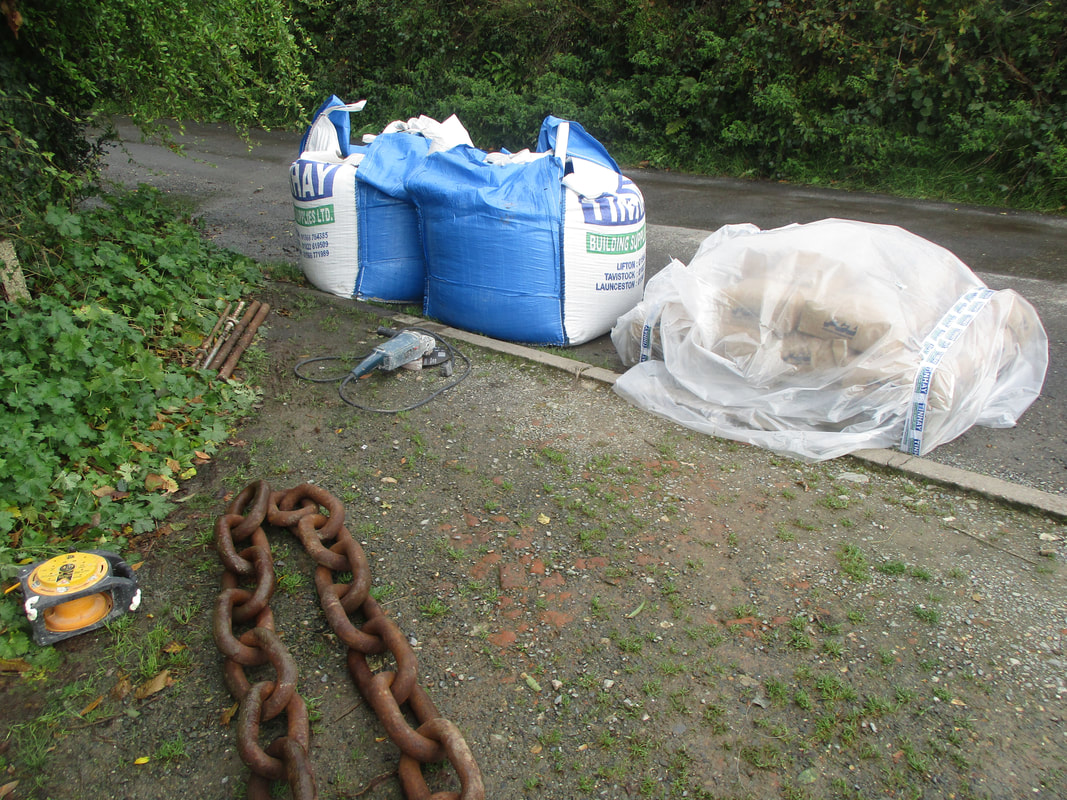
Round here if you want a mooring made you have to do it your self or pay serious cash for someone to make it for you . First thing was to work out how big we needed and how big we could move on land and on the water - Max the barge would carry is 3 ton and the min size we needed was 1.9ton , The max our friend could lift was 4 ton so we went for 2.6ton block . First this was to do some ordering , 1st order consisted in 2 dumpy bags of ballast and 300kg of portland cement . the hardest part was to source the ground chain - after 2 weeks of phoning and emailing local companies we found what we were looking for - 40mm ferry chain and 25mm riser - another 300kg .
To make the block we managed to borrow the club mold which is simply 2 flat sheets of steel that bolt together, simple but very effective. 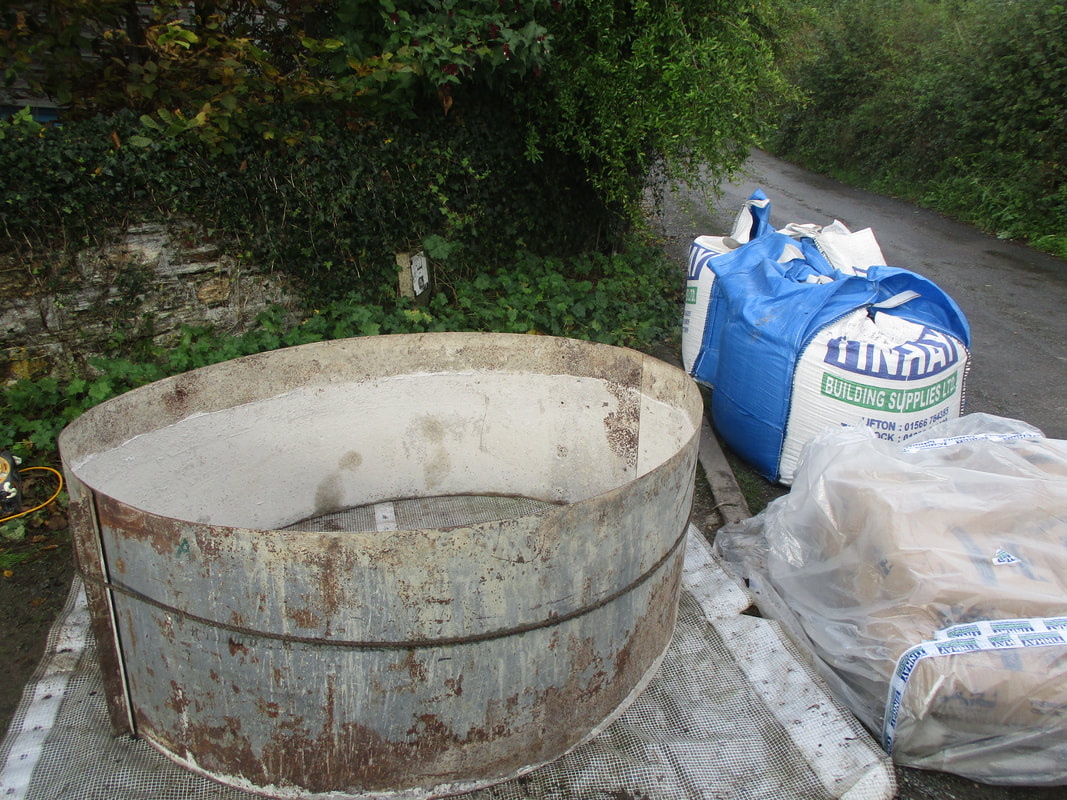
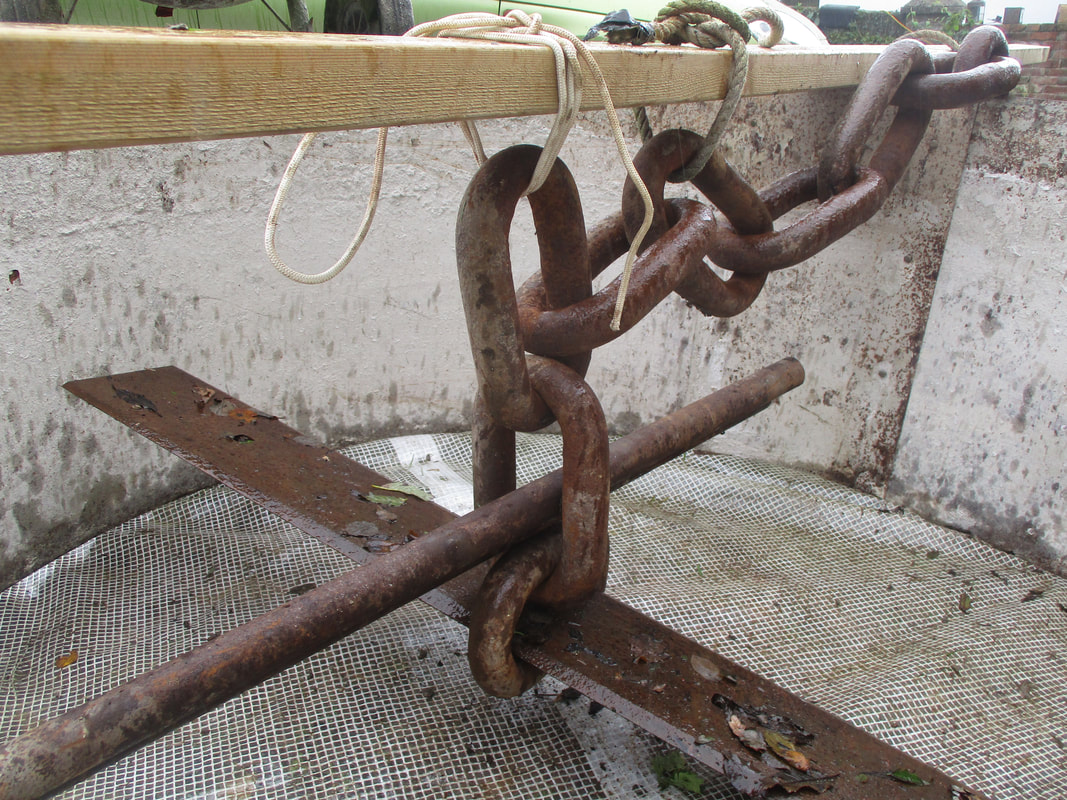
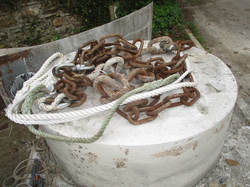
To secure the chain in the block we needed some heavy steel , Luckily we just happen to have a lot of scrap bits [ or junk as others call it ] and in there was a 3inch diameter steel bar and an old Loading shovel blade which fitted the links perfect
Then came the hard part , 4 hrs of mixing cement and shaking out the bubbles .
Jake worked hard through out this but he enjoys messy jobs but was knackered at the end . 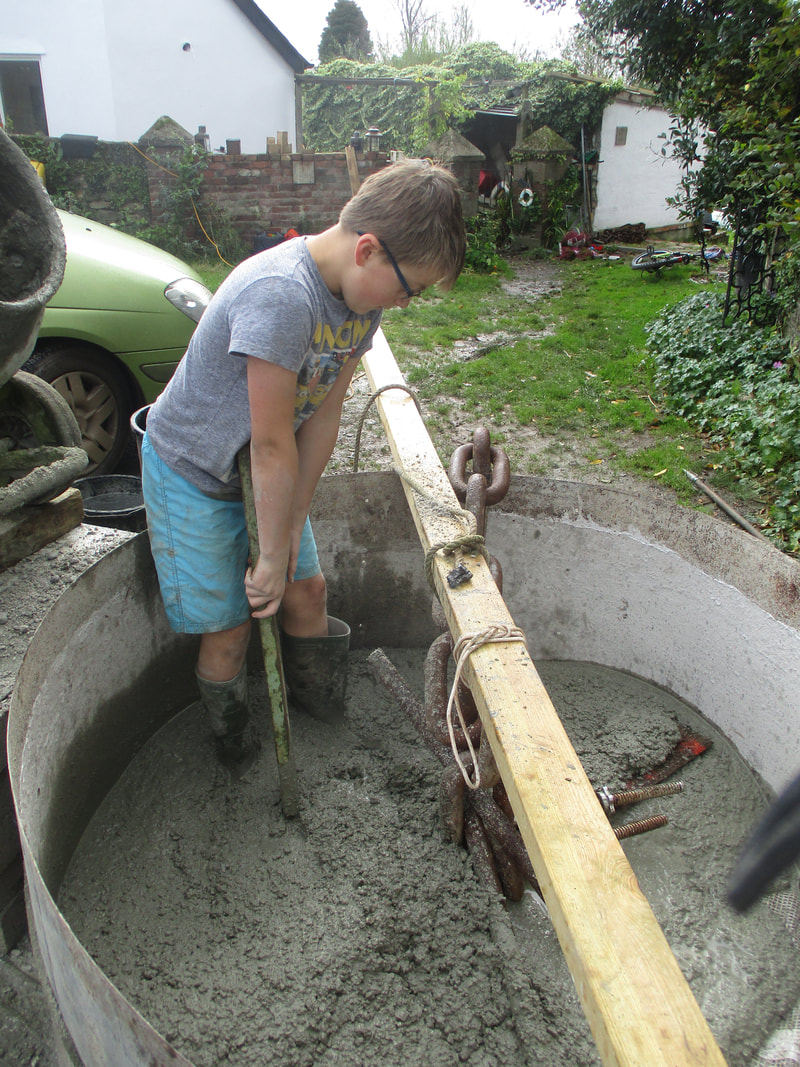
In between some heavy rain and cups of tea we soon started to crack on with the job in hand .
Worst part was we dont have a out side water supply so we had to also bucket by bucket over 300ltr of water out from the house up the drive to the mixer . 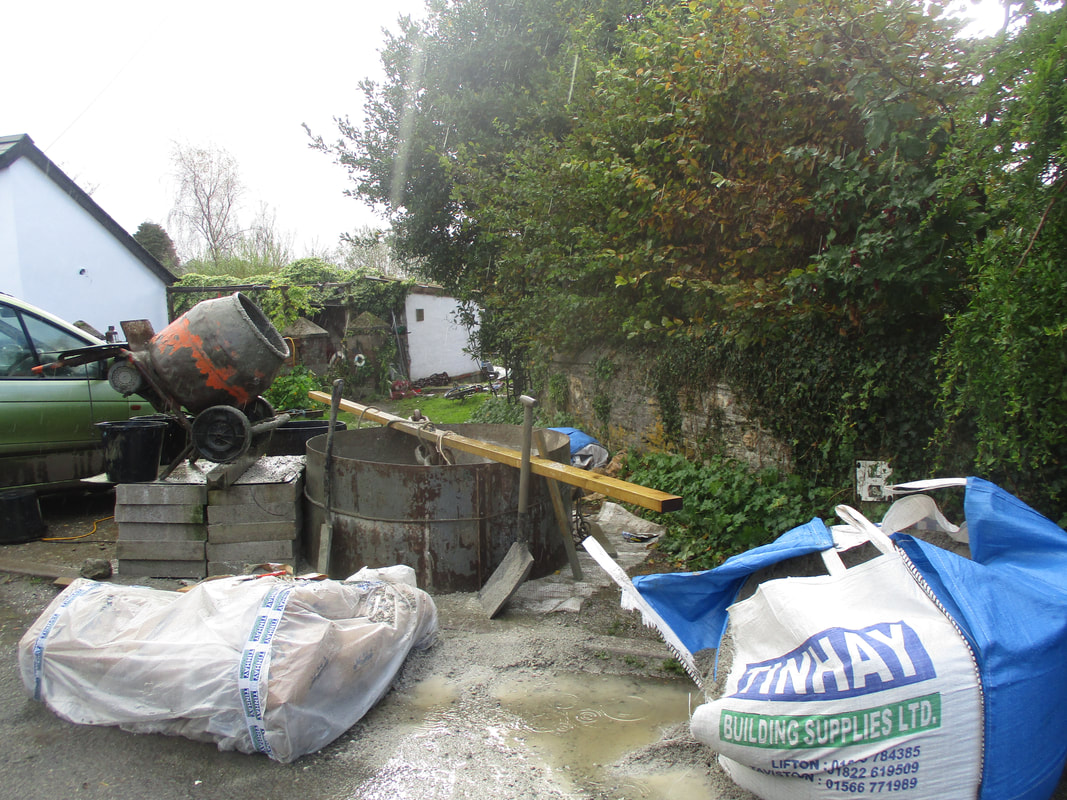

Once were done we had to wait 12 days for the concrete to set fully before we could move it to the slipway in readiness for the barge to move it out in to the river .
In the mean time we needed to locate a A5 buoy [as all the ones we had were too small to float the chain] and some 30mm warp to make the strops . Also we needed to attach the riser chain and swivel and buoy rope . 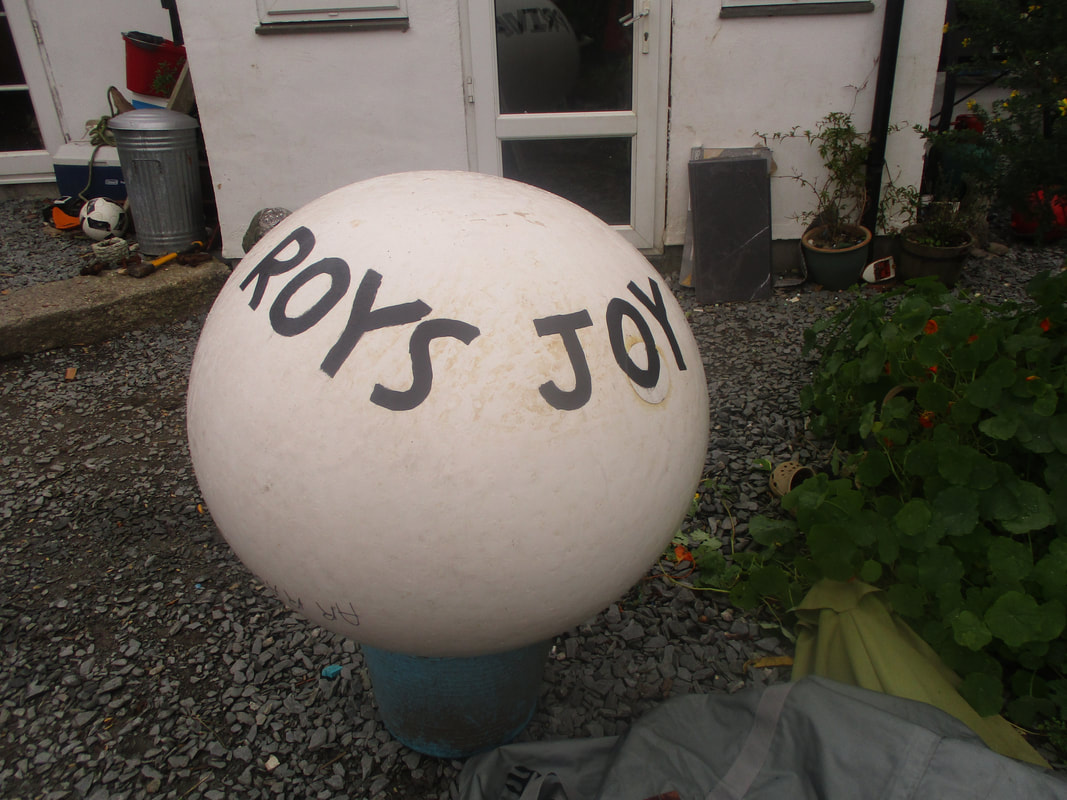
With a stroke of luck we found a buoy locally after being again let down by a seller up country and at a bargain price of £25 who could complain as the RRP is around £180
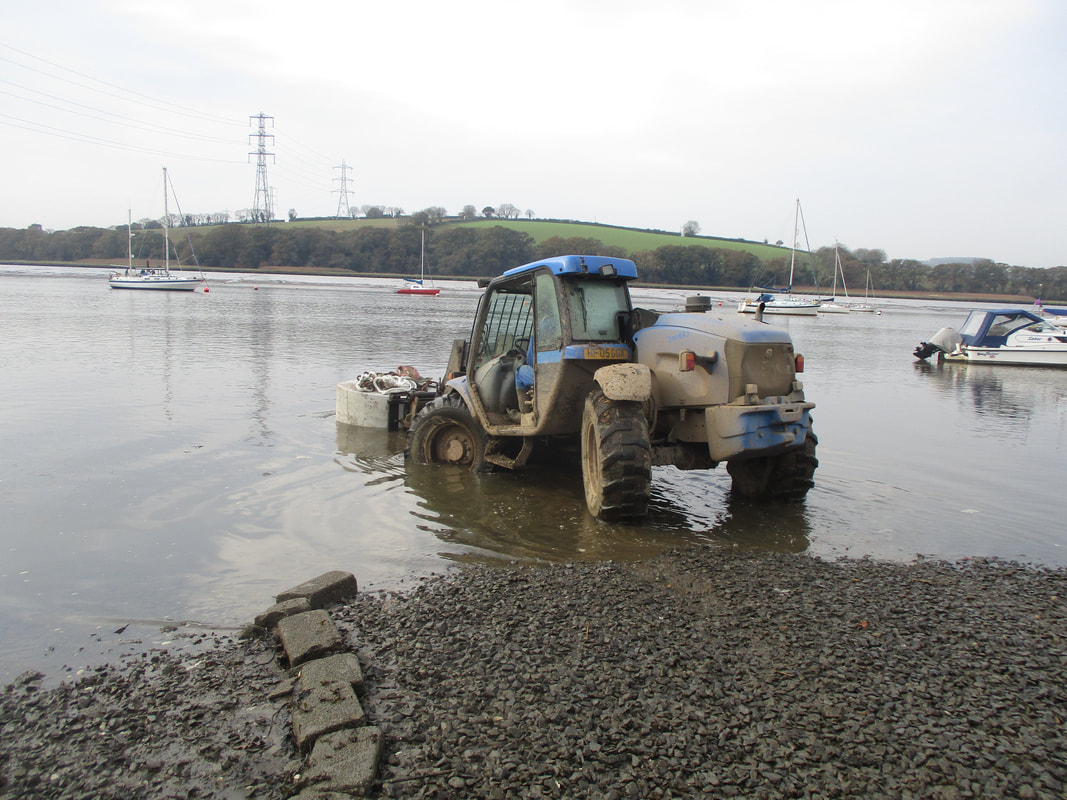
We also went to the local army surplus store to get the 7mtr of 30mm and 22mm nylon warps at £65 . these we spliced with one hard eye and one soft eye . Over the top of these will be 3 mtr of layflat hose on each to act as a chafe guard [ on order £8 from ebay] . After the 12 days we booked in our local farmer friend who picked up the block and took it the 1/2 mile down the lane to the slip and placed it at the spring low tide line . 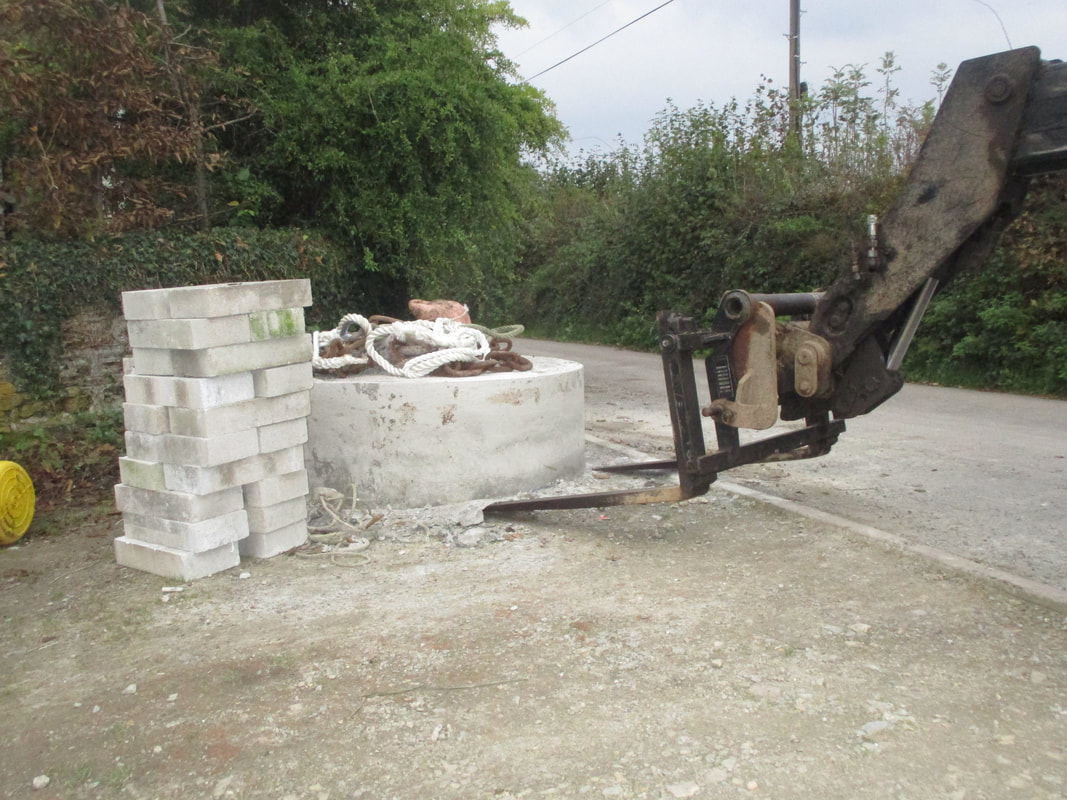
We then attached the new buoy to await the barge.
We have the club mooring barge and crew booked in to pick up the block and take it to our spot 1/4 mile up river . The day came to finally lay the new mooring . High tide was needed so we had the barge booked for the morning 9am sharp we boarded the Barge picked up the mooring with the block and tackle and motored the 10 min up river , After some positioning I was given the hammer and told to drop the block when I was happy with the position . This barge uses a large pelican hook to release the moorings and 2 hits had the block released and the mooring positioned. 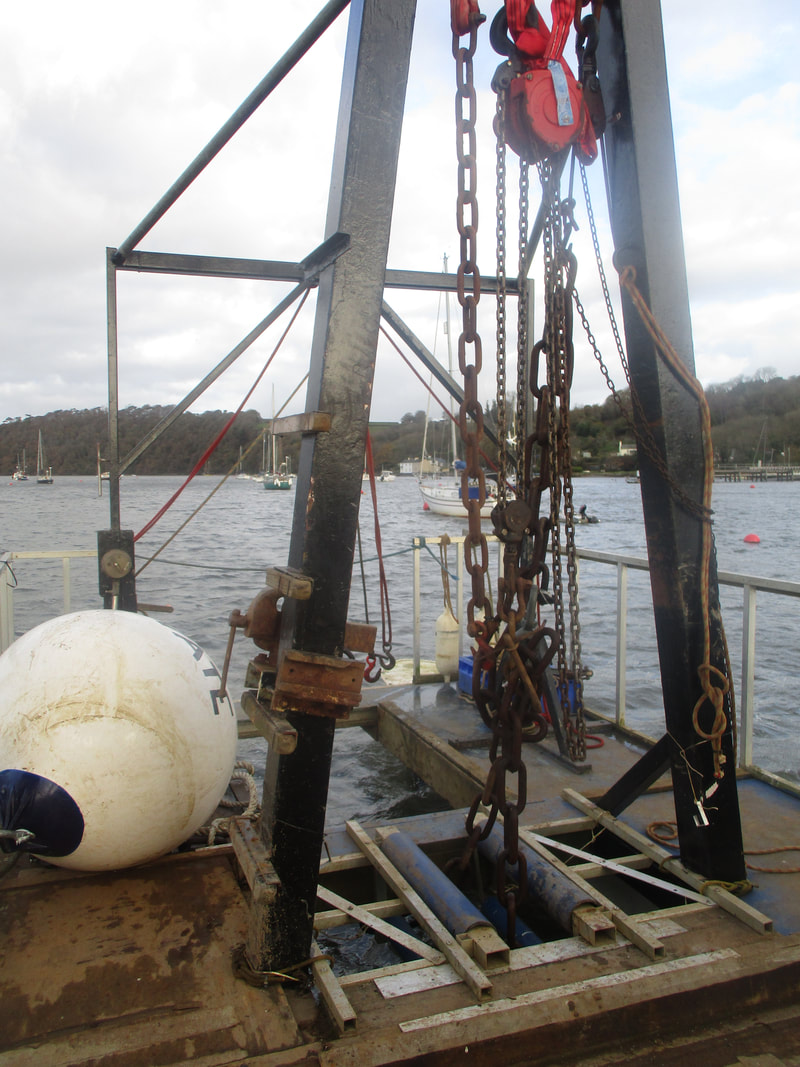
Next morning we headed to our new mooring to add a pick up buoy then went to get Roysjoy . Me and Jake said good bye to the yard mooring and motored the 3 mins to our new one . After a little faffing about we had her tied up [ one of the strops had twisted on to the chain on dropping the mooring] .
Now we ca drive 1 min down the lane and Roys joy is right there so we can now keep a better eye on her over the winter months . 
Costs of making a mooring
Cement and ballast £168 Ground chain £140 Riser chain £138 Shackles £35 Swivel £25 Strops x 2 £65 Lay flat hose £8 A5 buoy £25 Galv thimbles £10 Telehandler 1x bottle Whiskey Mooring barge £30 Total £659 + Anual rent £178 PA
Suppliers and services links
Shackles - chain swivels and warps from https://knightsurplus.co.uk/
Buoy from https://plymouth.cylex-uk.co.uk/company/marine-bazaar-13161215.html
Temporay mooring from http://www.weir-quay.com/
Strop chafe protection from http://www.ebay.co.uk/itm/Yellow-PVC-Layflat-Hose-Water-Discharge-Pump-Irrigation-Sold-By-The-Meter/202072813000?ssPageName=STRK%3AMEBIDX%3AIT&var=502068449425&_trksid=p2057872.m2749.l2649
Mooring mold - mooring barge from http://www.weirquaysailingclub.co.uk/
0 Comments
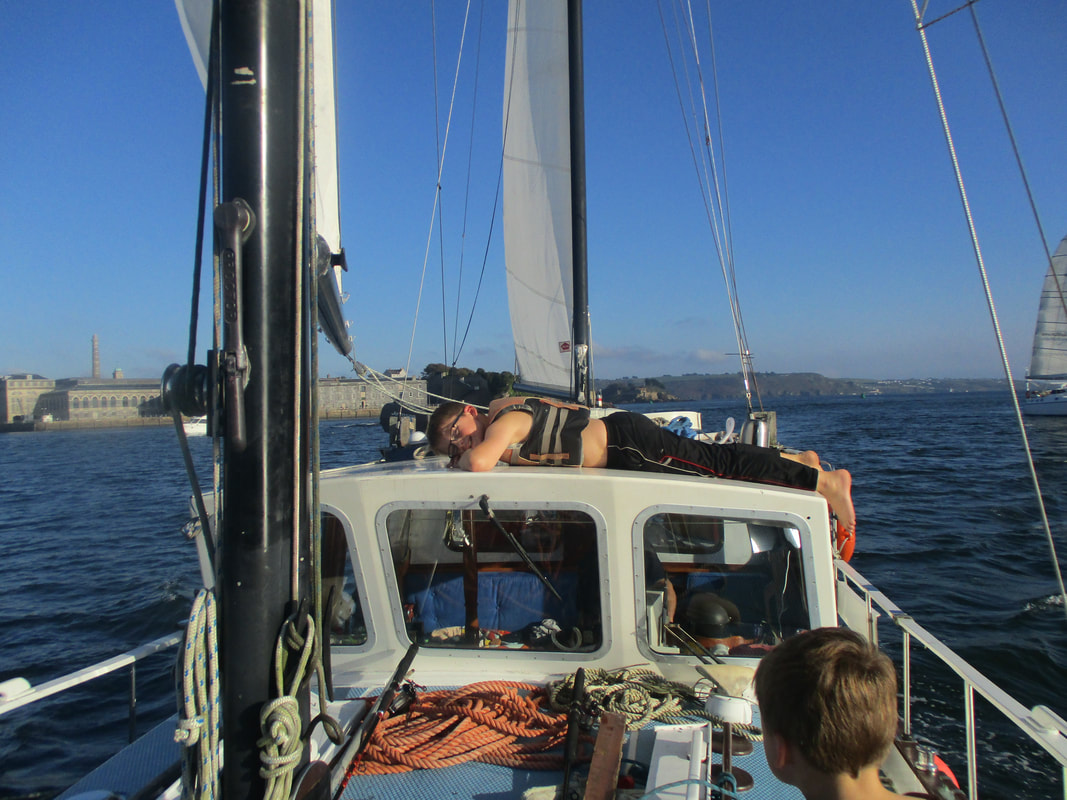 I had 9 days off work and we had a great weather window before storm Ophelia arrived here in the Uk . Leaving Friday evening straight after work we headed down river to pick up a buoy near the mouth of the Tamar for the night .On arrival we got dinner ready and dropped a few lines over the side to see what was about - Not much 1 x pounting 1 x dogfish. Next morning the weather was perfect to get out and test the sails and systems but First we hopped round the corner in to Barne Pool there we anchored and went ashore to have a wander about the Mt Edgecombe estate, on the Cornish side of the Tamar http://www.mountedgcumbe.gov.uk/visit/the-gardens/#1491226864988-4b045818-e2d4 After testing the windlass we headed out through the Bridges and towards Penlee point while sorting the running rigging and correcting a few issues with the sails [then realized we had left the main battens at home] grrr. But the weather was fine with a gentle 10kn onshore breeze - perfect for our first trial of the rig for our return back to Plymouth that afternoon . While on the way out we were heading in to the incoming swell,s very well and comfortable until letting the Mrs take the wheel , first she wanted to go side on to see how Roys joy rolled - Yes she roles well , Well enough to send the entire galley across the saloon 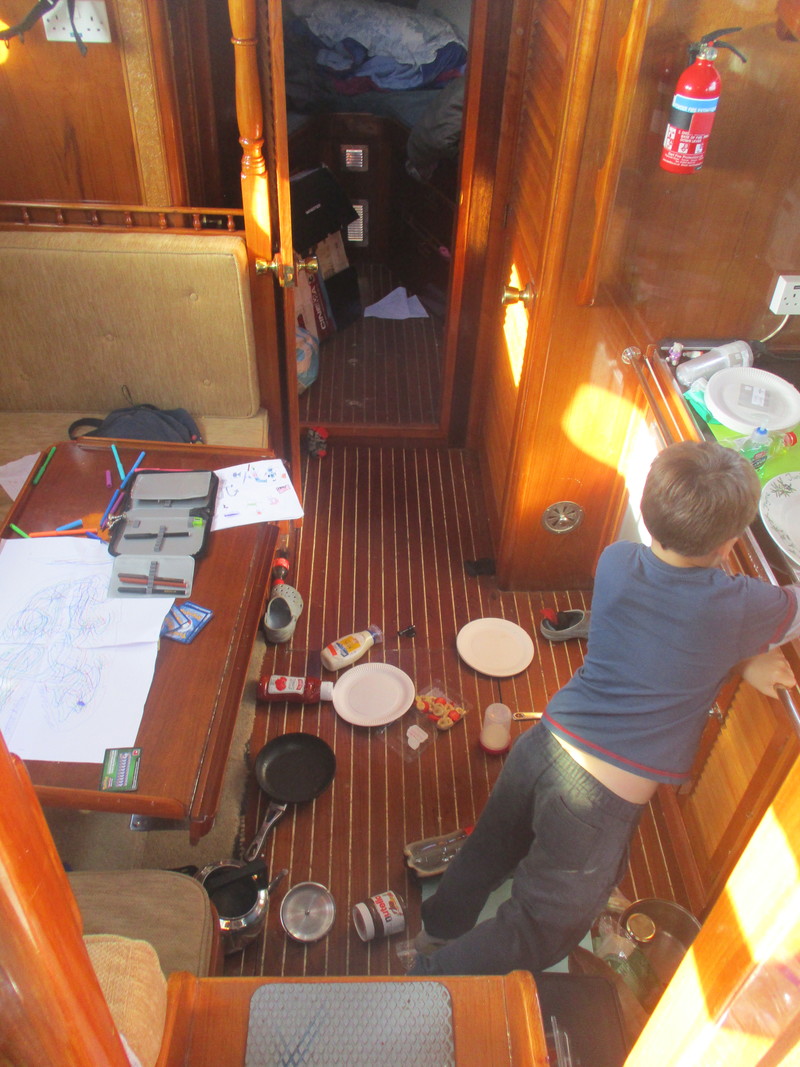 And she rolls enough to send a hank of rope overboard of the wheelhouse roof , Although we used this to on advantage as a great test of our MOB skills carried out by Jake [11] faultless and first time 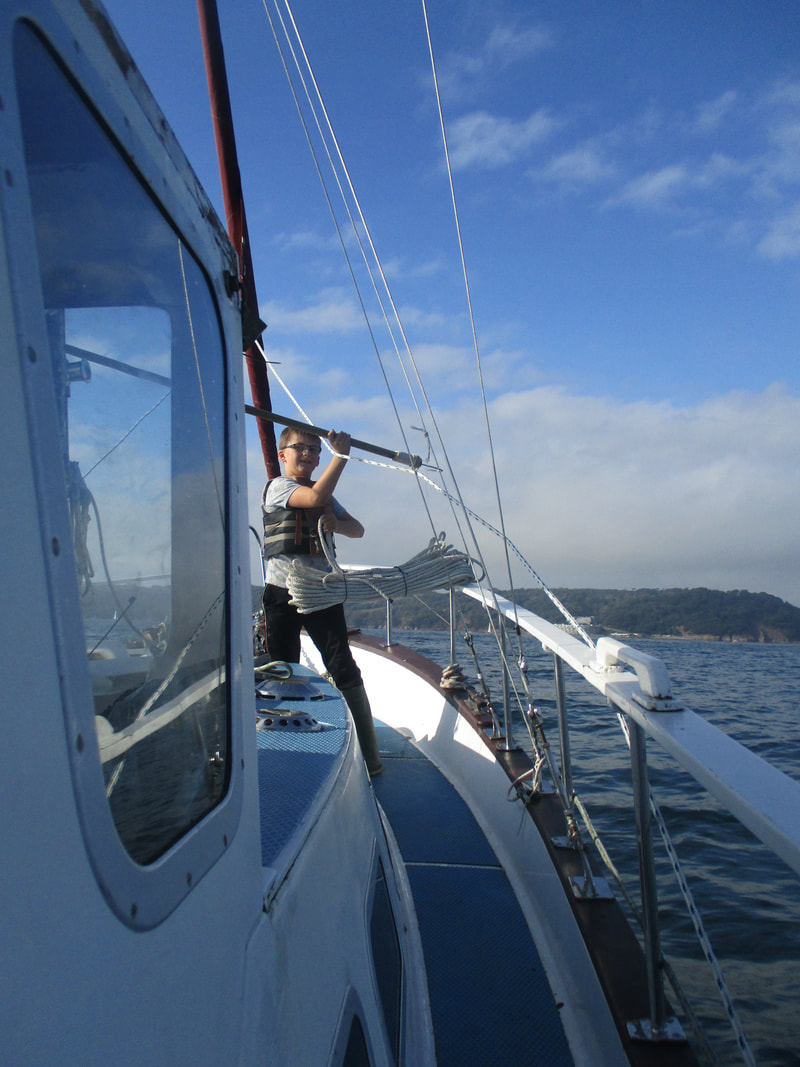 This was on our way in to catch the tide back up the river , Sails went back up just after the antics and the wind dropped to just over 6kn so a very slow gentle sail back in to Plymouth sound where there was a dingy race going on so some careful dodging and maneuvering of both us and the dinghies was fun. On approach to the bridges we had to start the engine as we were making just over 1 kn under sail as the light airs turned to nothing but we decided to pick up our borrowed mooring near Torpoint for the night as winds and tides were better for the next day and planned for an eirly start . That evening was spent adjusting some of the rig again and replacing a few main sail slugs that were not sliding properly and replacing a faulty sheet block . Next morning winds were perfect and the tide in the right direction so breakfast and up with the sails straight off the mooring . We were making 3.9kn on average with the wind on our stern , The main and mizzen worked faultlessly but the Genoa was struggling to stay filled [spinnaker pole added to list of need] but under sail all the way back to our mooring at Weir Quay A quick tidy up and the trip was over . 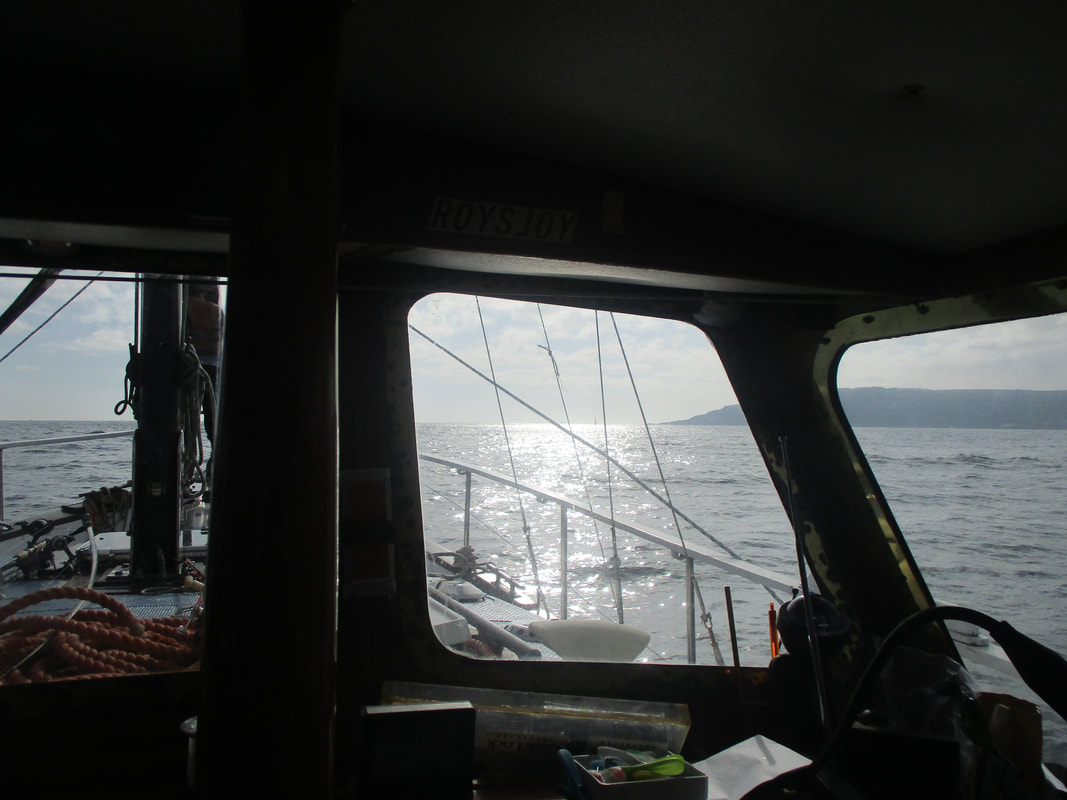 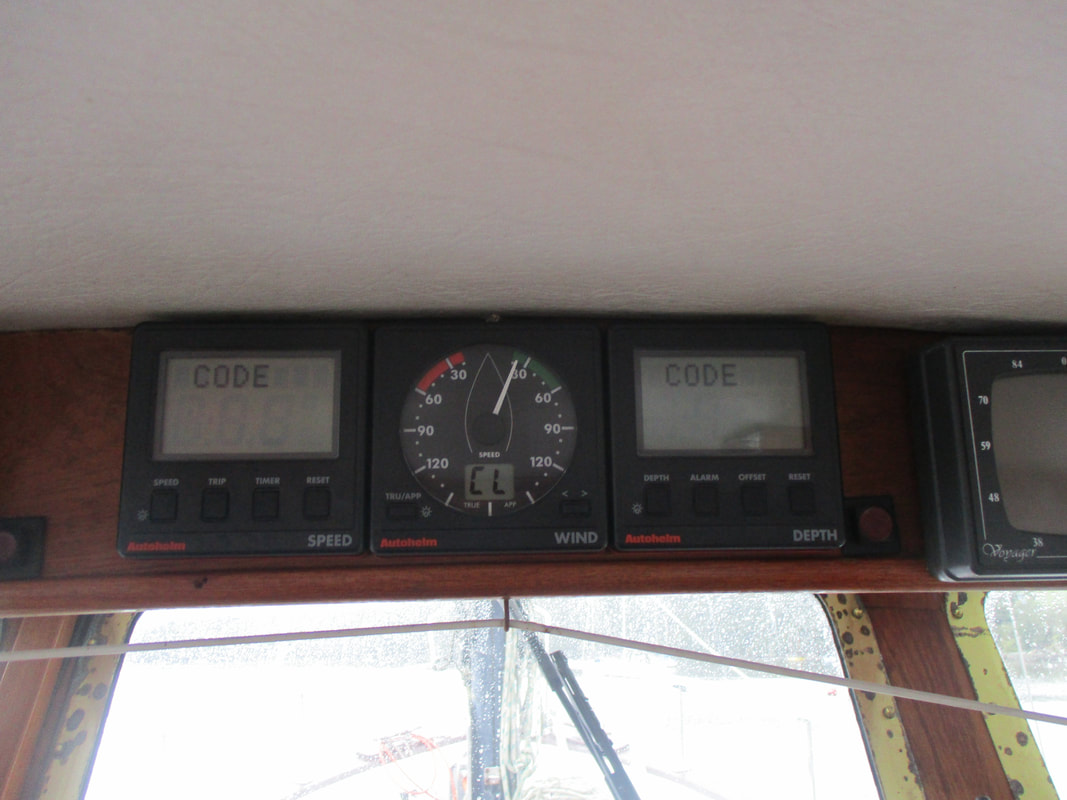 Ever since we purchased Roys Joy we have had no ability to use the autohelm nav gear , This is down to the previous owner setting a code lock on them which we were never given as she was purchased through a broker and through the owners family meaning the number was not known . So ive been looking everywhere hoping it would be noted down somewhere on board . Until now i have tried every no i have found even the usual ones 0000 - 1234 - build date 1993 etc with no luck . I have looked in to having the units reset but this either requires sending off to autohelm or by paying a dealer with a special box to reset at a cost . So we were getting to the point that replacement would be cheaper in the short term as we could simply fit a cheap sounder and standalone wind instruments etc but again this we have no budget for but needed for the local area . Fast forward to today and while carrying out some checks on the helm area i noticed a faint outline of a 4 digit no on the side of the compass , "surely not" i thought before trying it in the head unit - YES , right in front of me all the time !! 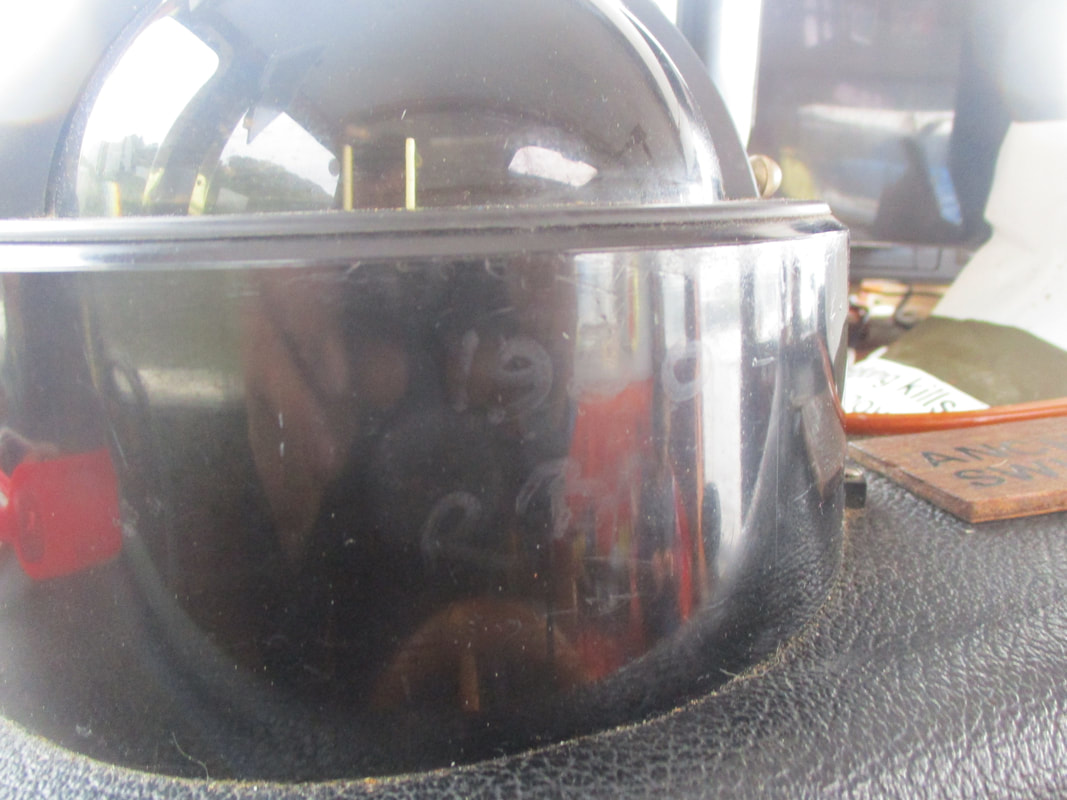 So over sight or over thinking certainly came in to force after 9 weeks of ownership i finally find what ime looking for literally right under my nose and on something ime always looking . best of all it cost me a big fat ZERO . 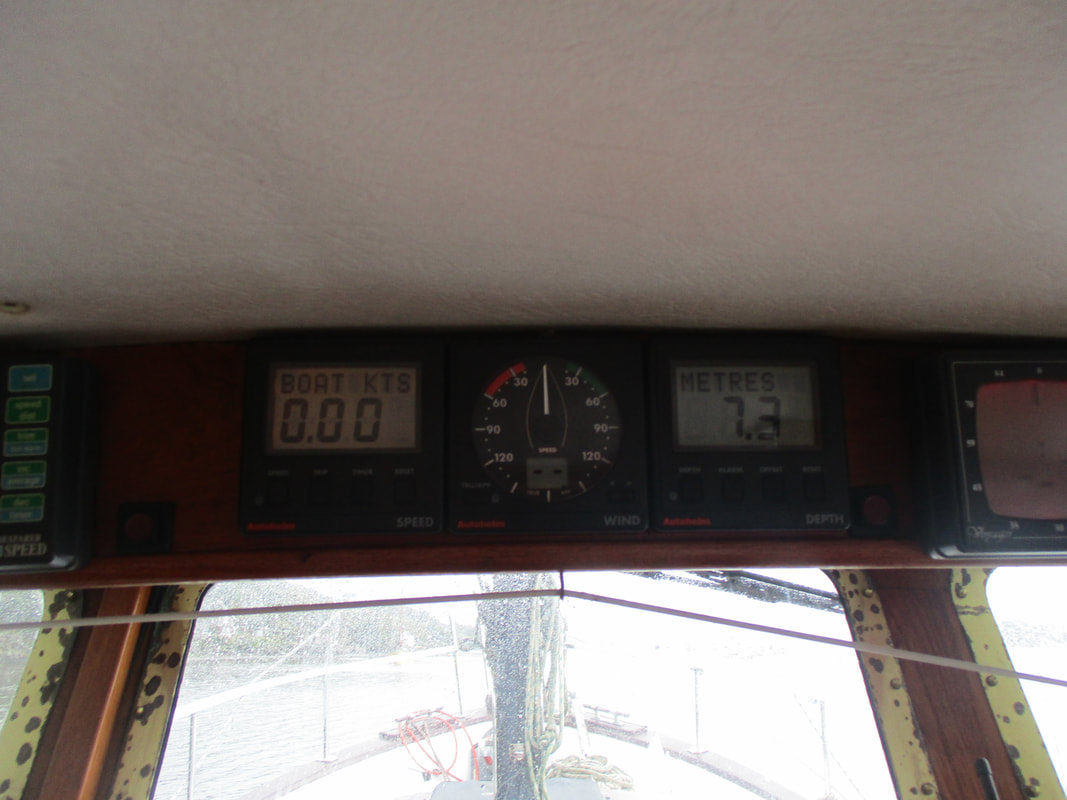 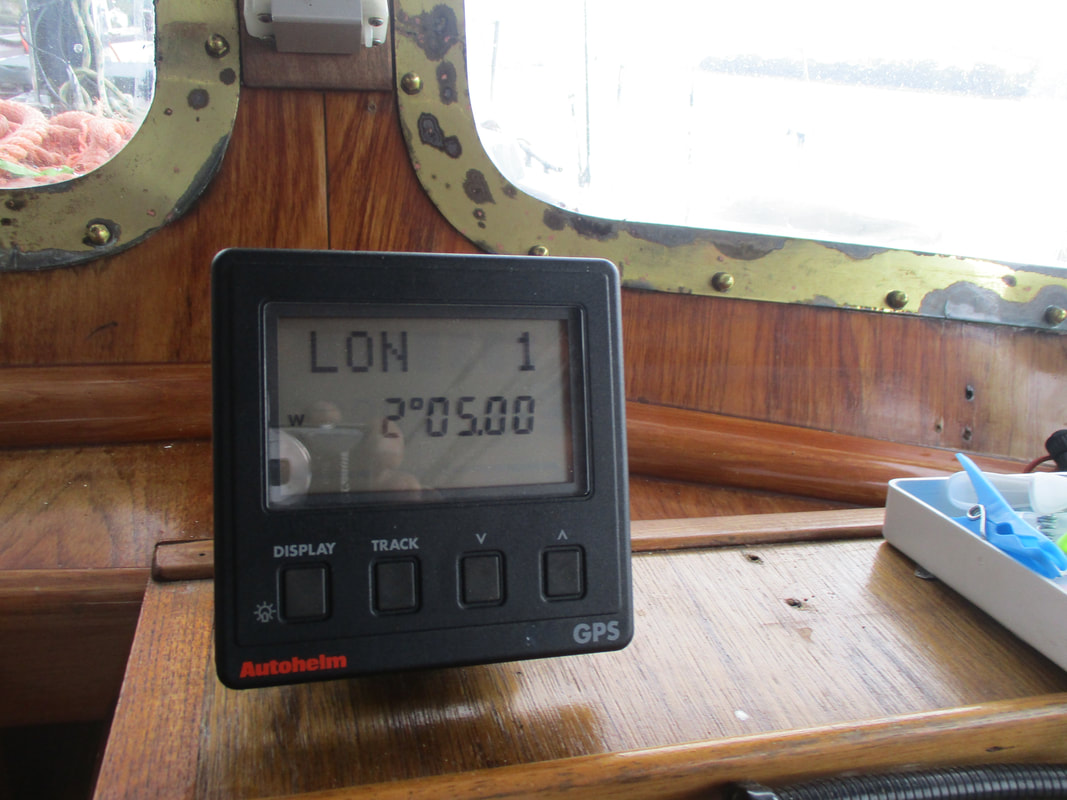 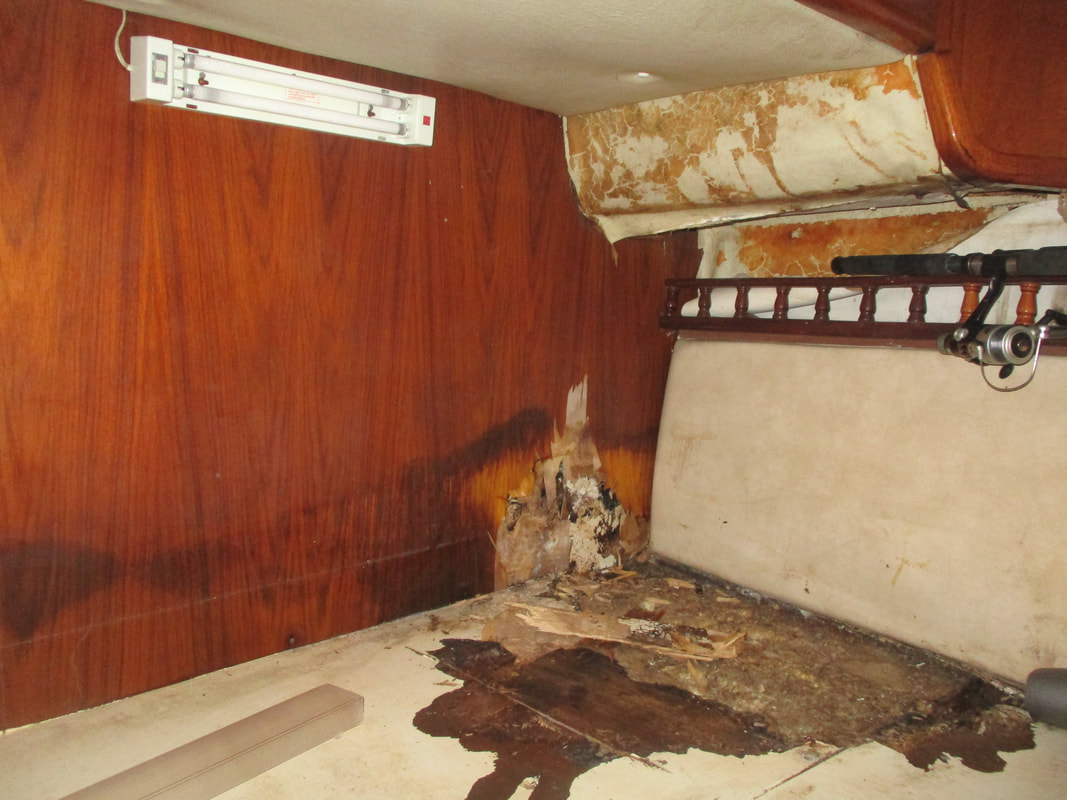 Today we started on the aft cabin , well more like started to look in to what was needed. The main issue on board was the starboard area around the aft bunk this is where the door leak water has been running in to for the past 2 years and had left its mark pretty well. The survey stated the entire bulkhead was rotted out but on first looks before purchase we could see there was a double bulkhead and a lower reinforced beam - it was the beam that has the most of the rot in the bulkheads were more of a separator from the engine room and not structural . Below this area in the under berth area is where no1 water tan is located encased in foam but surprisingly this was damp but not sodden wet so should assist in removal later on . 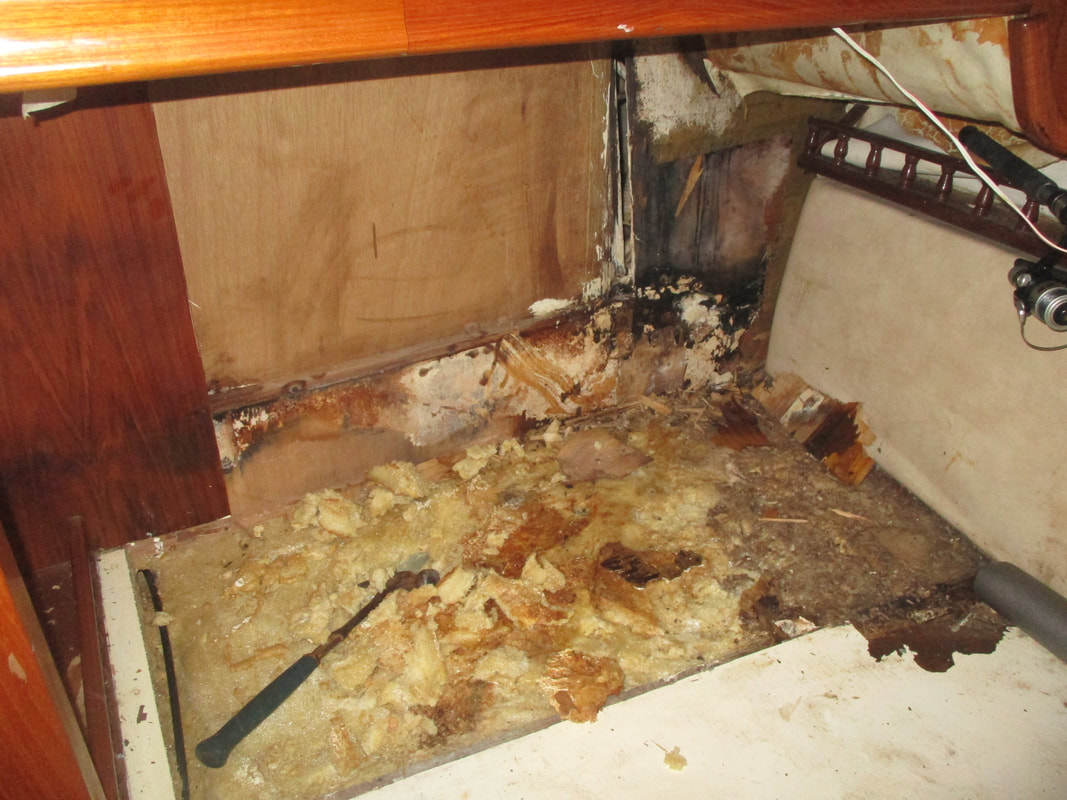 After removing the top section of ply we could see the structural beam section which presumably goes right down to the hull beneath the bunk and behind the water tank . The foam is properly stuck but will come off ok and has shown a GRP tank below which ime going to hope is not glassed to the hull but molded and bolted in as these are going to be revamped and refitted after the wood work is complete .Ime hoping to get back down this week to crack on with ripping out the bad bits and working to getting the tank out so we can see the full picture and plan ahead . Behind the other side of the bulkhead lies no 2 fuel tank and i need to work a way of removing this also to clean out and check over . I was hoping removing this section i would see the end of the tank but nope its further back so ile have to investigate further in to that and all of the head linings and side linings are pretty much unscathed and removable . 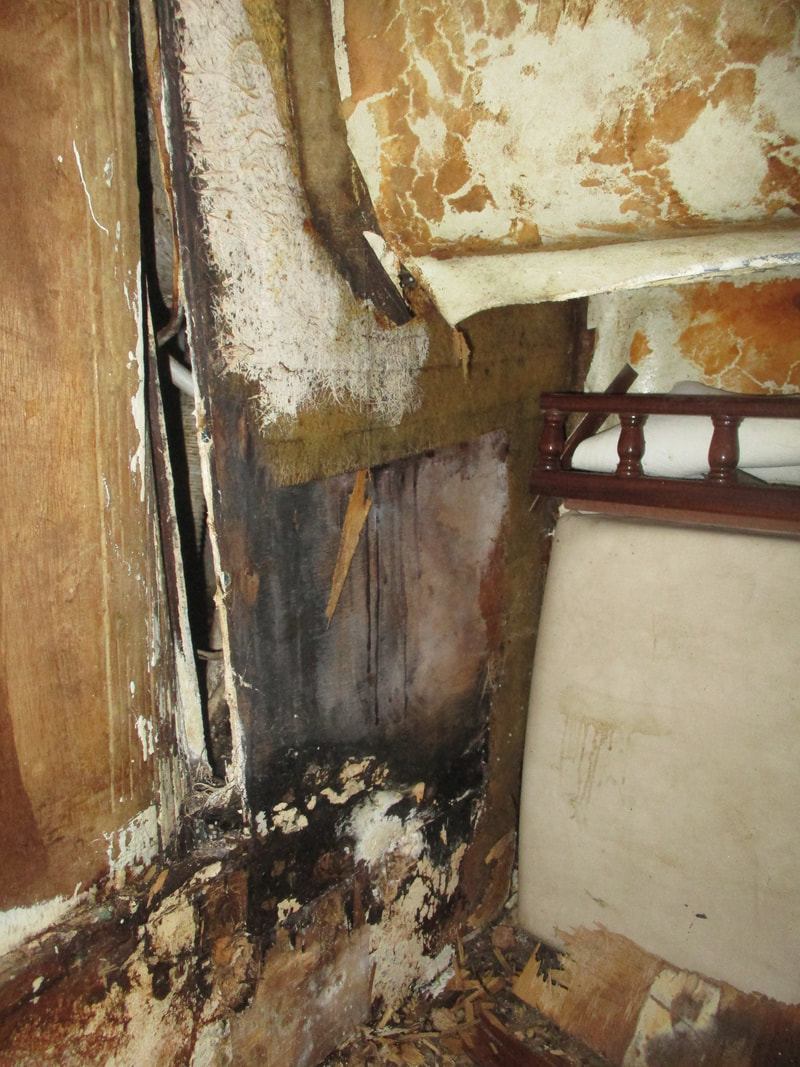 One lucky part is there is minimal service runs in this area so its just GRP and wood to contend with and one cable run to the autohelm & steering [running over the water tank . The structural part of the rot does not seam to be right the way across the beam but just isolated to one corner although full replacement will be carried out it is better than we thought so far .
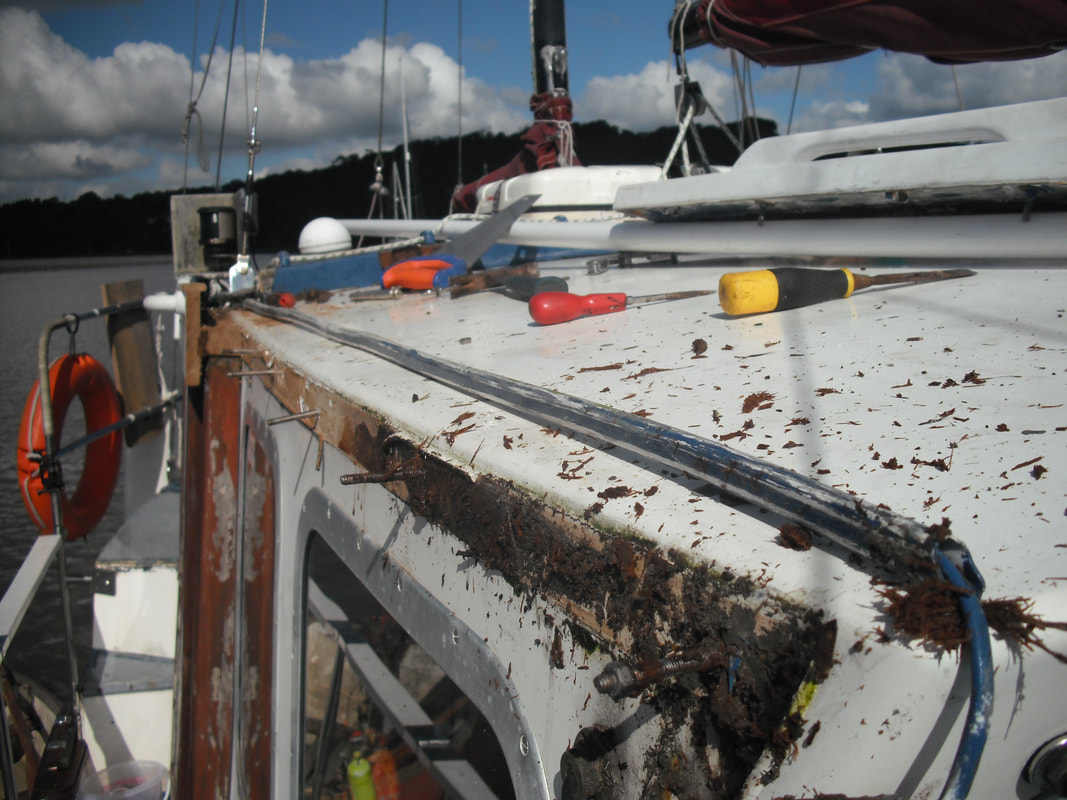 With winter approaching we have been waiting for a decent break in the weather to get the leaks closed up . This week we had the chance to get on with the 2 main leaks above the wheelhouse doors and to remove some of the rotted wood that is causing them. We needed to stop the ingress of water before we can carry out the internal repairs but we could not do a permanent repair until we have all the wood ready and cut to size and also we need to remove the doors and revamp them over the winter . This meant a decent temporary repair had to suffice. PVC strip and sealant was the way forward and was easier that i had first thought , the combings above each door was in 3 parts and although the bolts were behind the interior trim of the wheelhouse i was able to chisel out enough wood on the exterior to get to the nuts . Once the wood was off i could simply cut off the bolts , push through and seal up . Port side wasnt as bad and i managed to save part of the combing with a simple strip of PVC sealed over the offending leaky section of timber 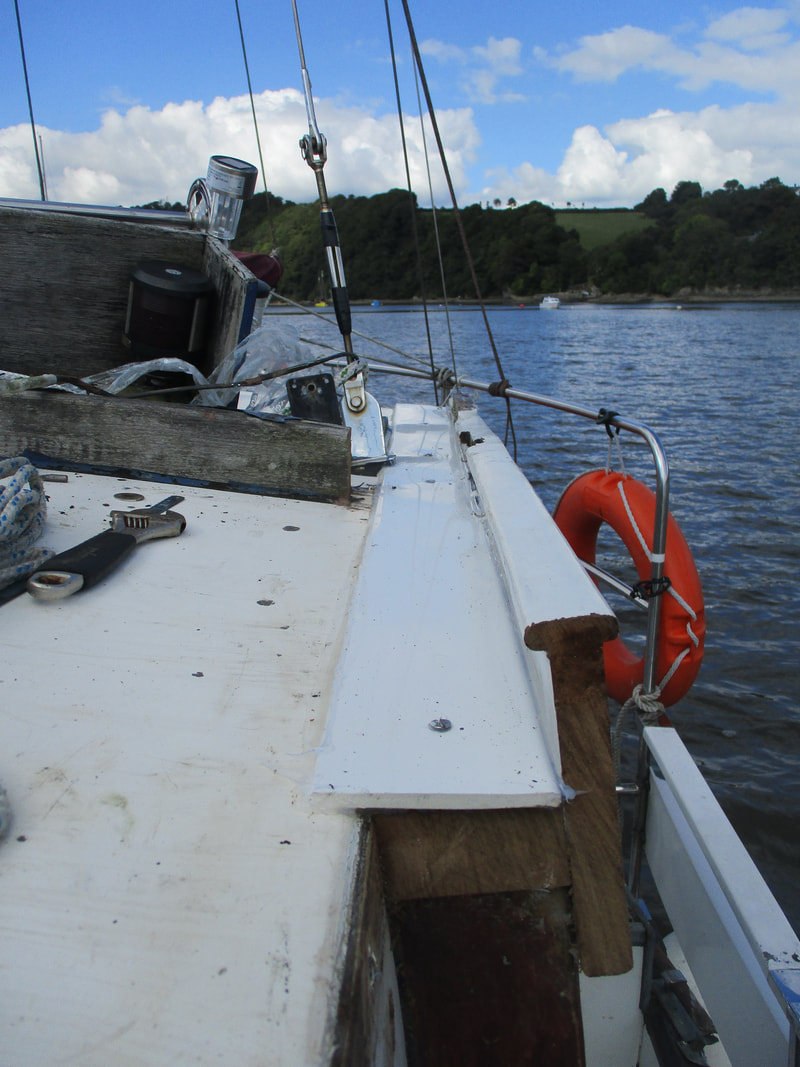 The starboard side was fully rotted at the stern end and once the front section was removed the rear section simply fell off . I had to leave the wood to dry for 3-4 hrs before covering up to get some sort of seal when i covered it in PVC . This side i had to repeat what i had done on the port side with the addition of the side panel above the door [where the worst leak was] The end result isn't bad but isn't pretty but mainly it is going to do what i need while i work on the new sides at home and while over the winter i can remove each door and revamp , also as we stop the leaks i can start work on replacing the water damaged sections on the interior  One other leak i managed to seal was the port deck drain , again it is only temporary but hopefully it will help in drying out that area a little . Going forward we are going to alter the way the wheelhouse gutters are constructed from the way the old ones were . first is to replace the wood runner section above each door and side panel , but only in the area of the door / runner. Forward of the doors is going to be a side panel directly on to the wheelhouse side with no wood gutter which will improve access down the side of the wheelhouse as previously you had to lean out wards a little to get past the gutter section [it should give another 4 -5 inches of shoulder space]. 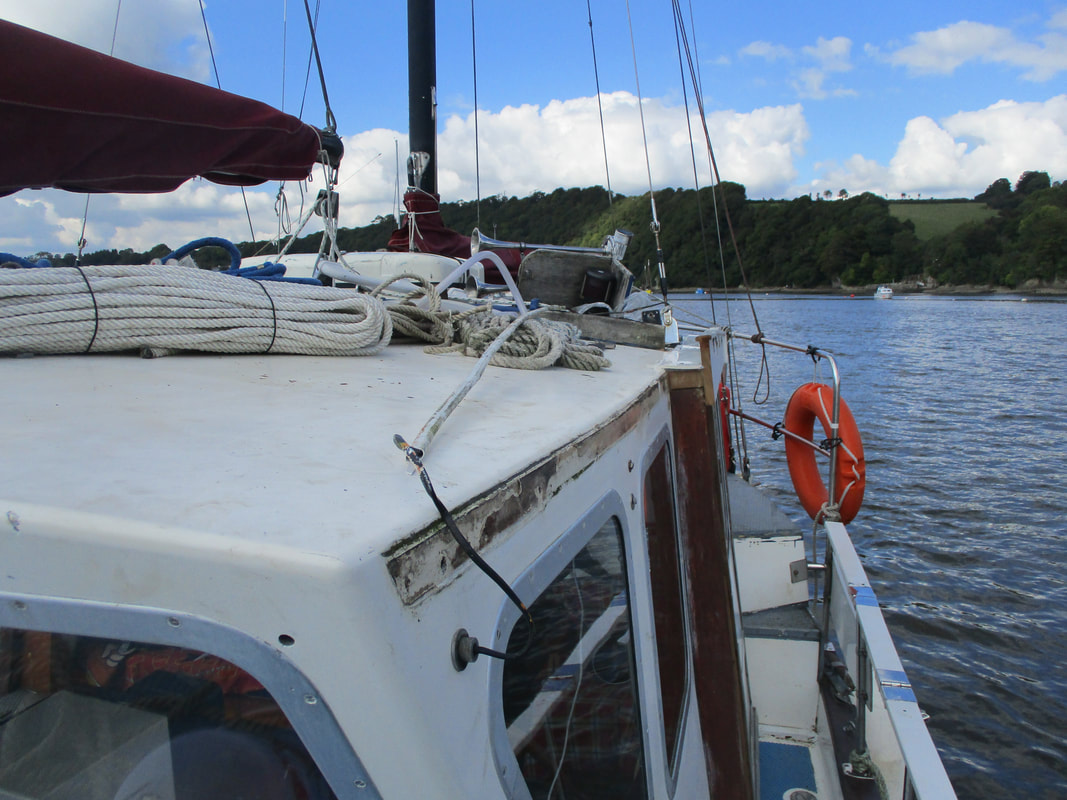 on top of the new gutter section over the door will be GRP bonded to the roof and flow-coated , this will prevent the water getting on to the wood below which is the reason for it rotting in the first place as water simply puddled over the door's. over time this has made its way in to the wheelhouse and in to the rear cabin , something i dont want again. 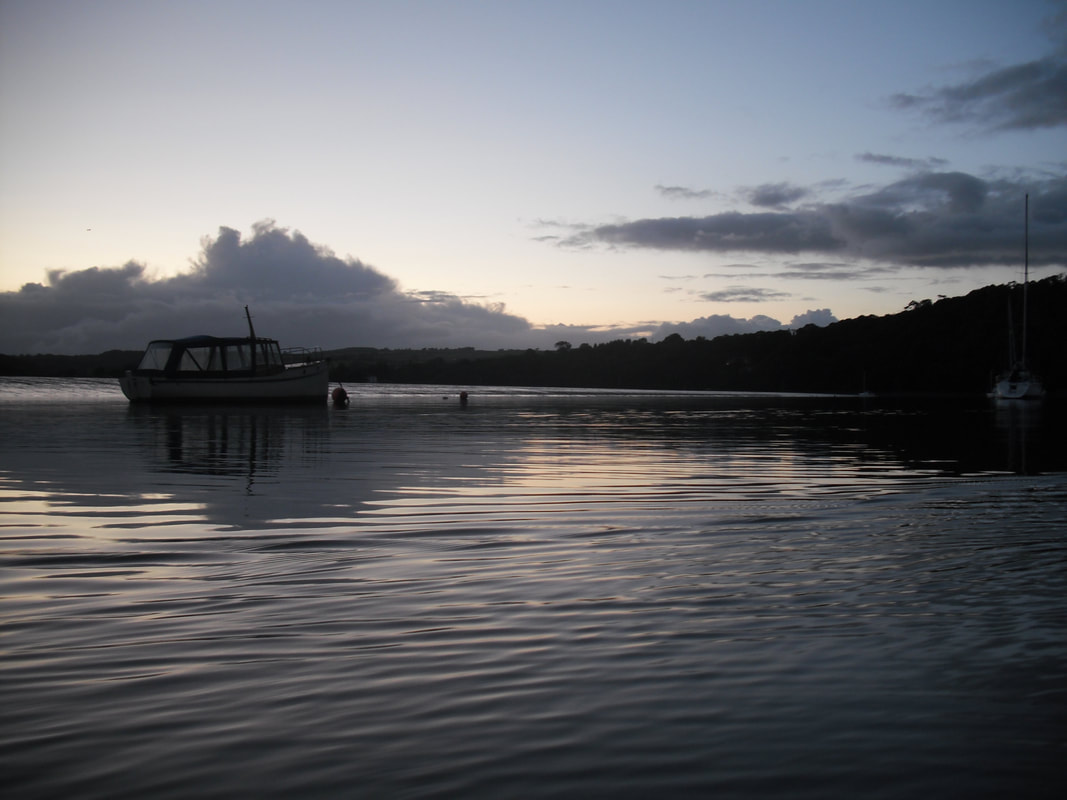 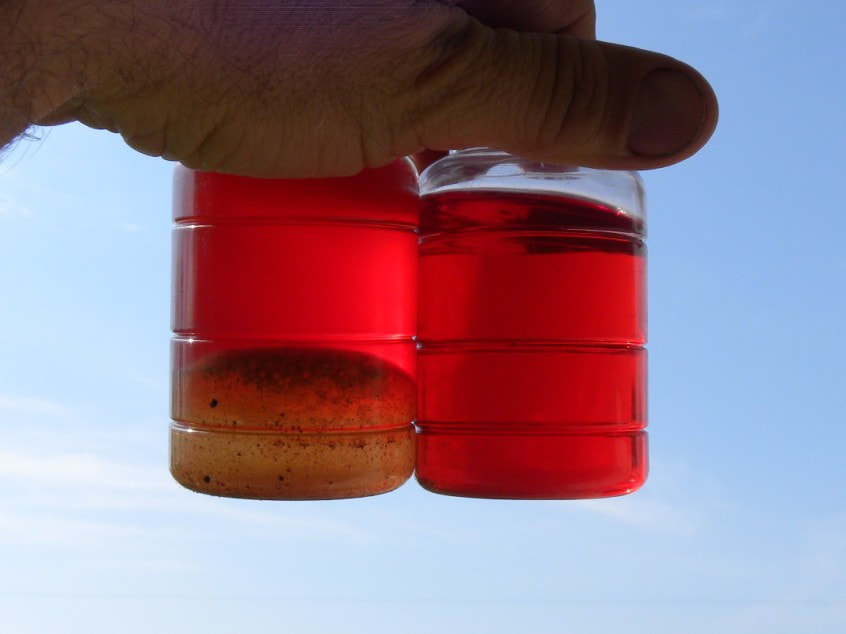 While the weather is totally pants outside for sorting the wheelhouse leaks I thought I would start to look in to what to do with the tankage issue we have on board . Just to reiterate what we have , We have 3 separate tanks on board 2x 500ltr main tanks and 1x 90ltr heater tank, the heater tank has some crud and water in it due to a damaged filler cap , starboard main tank has what we think is diesel bug in and also so much other contamination it is out of action , port side main tank had minimal contamination and is usable at present . Plan A was to drain all the tanks clean out and re fill with fresh fuel . Although this would take some serious effort it would also cost a huge amount with both tanks being full . This would involve pumping out , hauling and disposing of 1000ltr of diesel . Plan B is to polish the fuel in the port tank and remove the fuel in the starboard tank and clean that one out . Again this involves a lot of money and time but we also have a plan C. Plan C it to make a diy fuel polisher to sort the port tank so we have a guaranteed propulsion supply on board without any down time , this can be done over a period of visits while doing other jobs on board and minimizes the waste of fuel and time put in to handling . It also massively reduces the cost and we would then be able to have an on board fuel polisher for future treatment . The starboard tank can wait till we get round to replacing the bulkhead as it looks like we may be able to remove this tank at the same time and empty and clean properly while the structure is out of the way , Currently we cannot access the fuel tanks apart from the filler cap and gauge flange. The Heating system is currently out of action although once this is back up and running i intend to remove the small tank and plumb it in to one of the main tanks , partly to save space but mainly to give us access to the forward area on the engine [currently the fuel tank prevents this due to its location ]. So fuel polishing research is what ile be doing to make up a system to sort at least one of our tanks out so we can have proper peace of mind while motoring but also to include this in to scheduled maintenance for the engine to hopefully prevent a future build up of gunk and contamination to the fuel 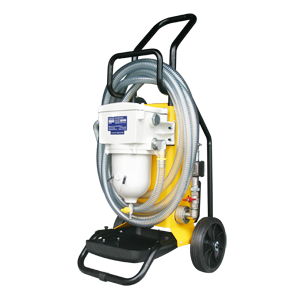 Every one knows when you buy a used boat your bound to find a leak or two. With Roys Joy we knew she had a few good leaks and where most were but since we brought her we had had perfectly dry weather and no real chance to do a proper search for the others, what we needed was a prolonged wet period to show the smaller leaks locations. This week we got that chance and while the kids were doing there usual Friday night sailing club we went aboard just as the sky's opened again .  The main issue or area we have leaks and large ones at that is the area around the wheelhouse doors and aft cabin , The gutters that run the length of the wheelhouse roof have a hardwood edge and right above the doors they have rotted allowing water to puddle and leak in through the top of the door runners . This is turn has made its way in to the interior mainly the aft cabin and rear of the wheelhouse and rotted the inside step area and the rear bulkhead behind the aft bunk . While we were aboard we managed to trace a few more minor leaks in the cleat fixings , deck drains and one window frame , All now jotted down and marked for future repair . So before we get on with the internal work we need to resolve the water ingress even if it is just a temp fix the sooner we get this done the sooner we can crack on with the internal repairs and refit . 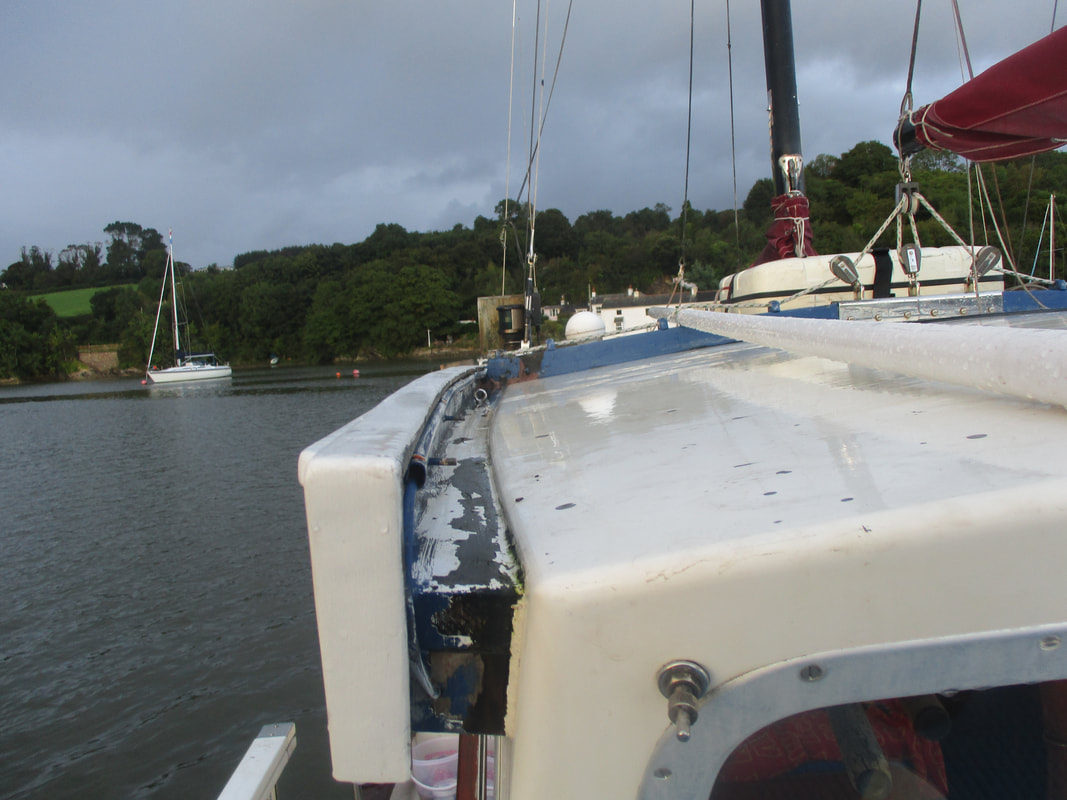 so the first this i want to do it to patch over the wheelhouse gutters to prevent the water puddling and further ingress , This i will be doing a temporary fix with 4inch pvc strip sealed and bonded to the the roof and to the side of the combings - this will act as the gutter and stop any water gaining entry to the leaky old wooden section . The cleats and deck drains is a simple job of removing the offending fitting , cleaning , re sealing and finally refitting all we need in dry weather again . One thing i never realized is there was a leak dripping on to the Eberspatcher heating unit and probably likely to be the reason this does not work . To be continued ... 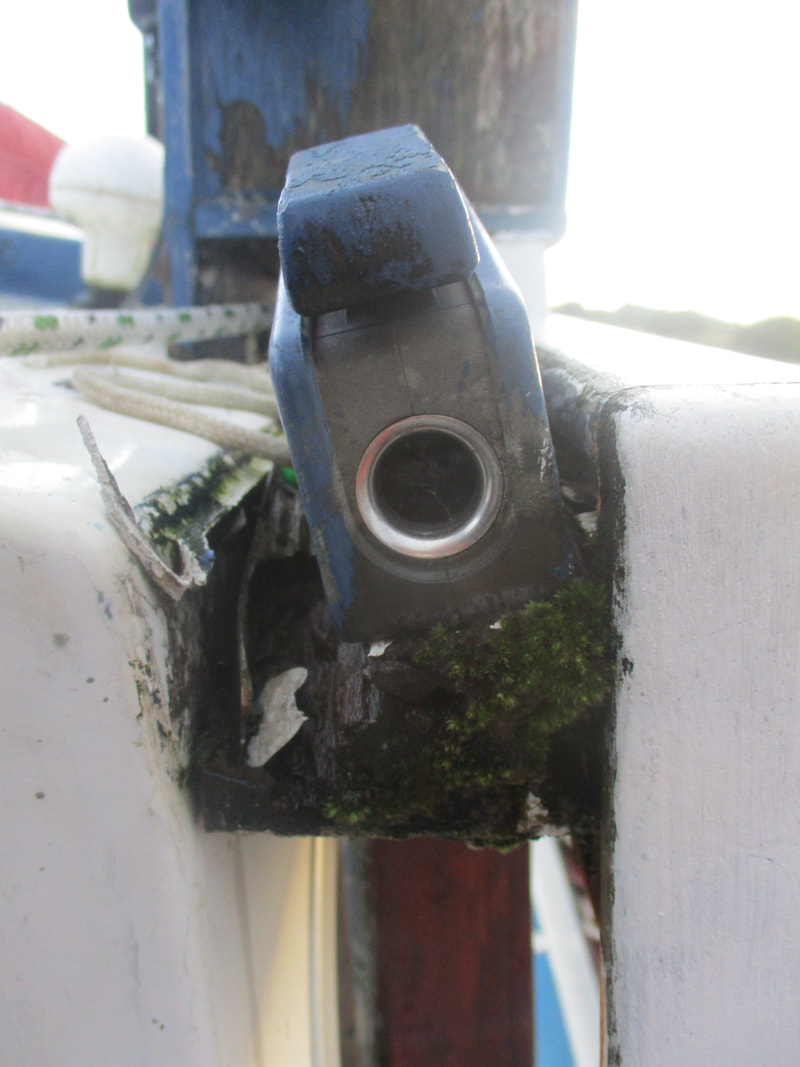 Last year i made a crude electric outboard for our tender .
This year i have finished it off and refined the thing and now we have a light weight - easy to use motor pushing the tender better than our 2 hp suzuki One of the benefits i wanted is the kids and the Mrs can use this its that simple and much more powerful than the basic shop brought versions Total build cost £0  Finally the day came to bring this old girl home .The weather perfect although zero wind was forecast and the sea was flat , Alarm went off for 05.30 boiled the kettle and off we set. Jake awoke just after leaving the berth , the sun was just rising as we headed out towards Berry head and the scene was set for the rest of the trip . Engine was ran at just 1200rpm and we were making 5.9 knots - every hour i checked the engine , Coupling and shaft seal just in case , remembering this was the first outing that Roys Joy had made in almost 3 years . Passing Berry head we were on spotting duties for the pot markers one of which even i had missed . By now Anna had awoke and we realized we only had enough milk for one coffee .  The plan was to take a wide berth of Start point with its well known messy seas when the tide was running although today you could see it was flat so we passed within 2 miles of the shore catching the tide a little bringing our speed down to 4 knots and saving a good bit of time and fuel .  Just as we were passing 3 miles off Burgh Island we spotted some porpoises off in the distance and after a little time they were playing at the bow 2 at a tie and we had the rest of the pod swimming along side . They followed us for a mile or so till they parted company and swam away . 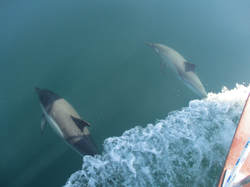 Lunch consisted of the prawns we had caught the night before and a cuppa with the last of the milk . Engine was running perfect although we would of liked to get the sails up , the wind was on the nose at only 2- 4 mph so there was no chance of that . Plodding along we spent ages spotting jellyfish , more porpoises , and a variety of sea birds feeding as we passed the water was so clear we could see the cormarants swiming under the surface chasing the fish .Then the crew started to drop like flies - Jake dozed off quickly followed by Adam leaving me and Anna to keep watch for the pot markers and enjoy the sun . I decided to top up the fuel tank to see what we had used , I only managed to get 35ltr in and she was full again which reintroduced the knowledge that the fuel gauge actually worked [Something i had my doubts about. As we were approaching the Mew stone just of the mouth of the Yealm the wind veered a little enough to get the head sail out which brought our speed up a little to 6 .5 knots keeping the engine at 1200rpm Heading in to Plymouth there was a mass of other boats after coming all the way from Brixham only seeing a dozen or so other boats it was a little crowded as we entered the Eastern side of Plymouth Breakwater . The decision was made to stop off at Mayflower marina to stock up on milk and stretch our legs , We woke the kids and headed up to the marina shop & Anna thought it would be good to pop in to the bistro / bar and get a few cokes £7.80 later I nearly had a heart attack . We let off the lines again and headed up just above the Tamar bridge to anchor up and to cook dinner while we waited for the tide to change so we could make it up over the muscle beds . The last stretch was only a couple of miles to our home mooring where relieved but also so happy to have her 2 minuets from home - We had made it . 58 nautical miles and 11 hrs motoring later we were home and Roys Joy had made it without fault and without issue but a few sleepy crew members .  So the original plan was to get to the boat Friday evening around 10pm [after the kids weekly sailing club meet] and leave Saturday early am . Although we would have to rush about to get ready as still had a few jobs to complete before untying the lines . So we have put Saturday down to a prep day getting the new fuel supply pipe fitted and changing all the fuel filters , fitting the new impeller and face-plate to the pump and lastly making sure we double checked the old fuel in the tanks and rigged up a backup supply . Once all this is complete its time to go for a last sea trial and re check everything . This is where things started to go a little wrong - we dipped the starboard tank and found it to be fully contaminated - although on initial checks was coming through the supply line clean - this meant this tank was totally out of use , then we dipped the port tank and thankfully found this to be ok [ a little off color and minor floating scuds but nothing to serious . So more fuel was needed apart from the 60ltr on deck as a backup , we popped to the marina office to see how it all worked with the fuel dock only to find we had 15min till it closed . The marina radioed the dock and we were told to be quick the attendant is waiting for us , So run back start her up , untie and head over . To get to the fuel dock we had to turn a 180* and back in while backing in i used the bow thruster to keep her straight as these Watsons dont like to do what you ask of them in astern , then the bow thruster died and filled the boat with the dreaded burning electrical smoke {Shit we are on fire was the first thought} thankfully the motor had burned something out and nothing was alight . After a little forward and back we got her along side , Filled up the starboard tank and the last 20ltr can we had and a massive thank you to the attendant . We spent a little time trying to get the thruster working again with no luck so headed back to the berth for the night . First main job was to replace the dripping fuel delivery hose - i had had one made up at the cost of £59 but this one was a flexible hose and also rubber so where it was located should not be prone to the odd splash of salt water and the rust but the last sufferd . 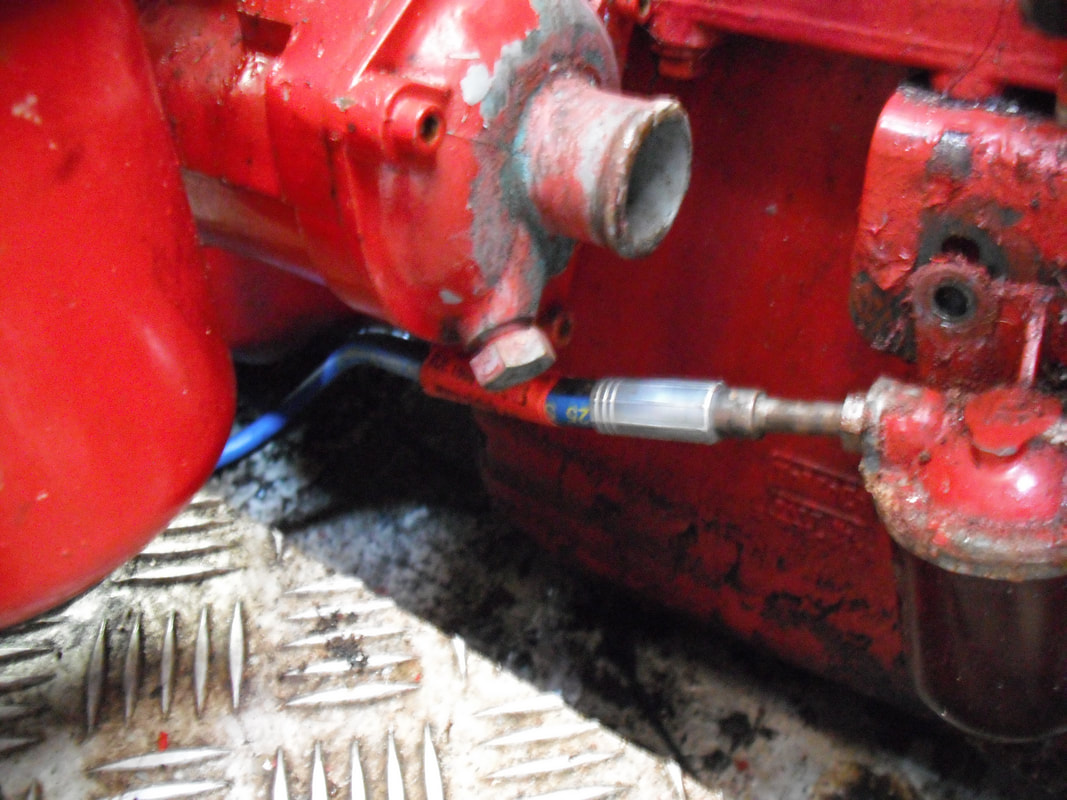 So the last job was to change the 2 usable fuel filters , First was the Starboard tank filter and water trap . This was complete within 25mins giving it all a good clean out and check over . Next came the main engine filter this was changed over and complete within 15mins , The system was bled through and engine started "sorted" i thought . There was a slight seap of fuel coming from the engine fuel filter bleed bolt so a minor re tighten and it snapped off spraying fuel all over me and the engine room [Oh Shite] , engine off and a major head scratch had me in the spares box of everything to search for something to replace this bolt with - other wise we aint going no where . First issue was to remove the old thread - this was achieved with a drill bit and cordless drill in reverse - Came right out . I managed to find one bolt with the correct thread in the odds box although too long it just needed a little packing to get it to work - so 2 x 12mm nuts and some thread tape for good measure had it sealed up better than the old bolt which must of been cracked or at point of failing anyhow . 3 hrs later the engine was started and all running sweet - no time for a sea trial today .
|
AuthorOne family renovating a Colvic Watson and preparing for an epic adventure Archives
April 2018
Categorieshttps://www.facebook.com/hambleys/
|


 RSS Feed
